Besides honeybees, chickens are one of the easiest animals for beginners to raise on a small homestead. They provide fresh eggs, high-quality meat and natural pest control, making them an excellent addition to any self-sufficient household. Here at the Kummer Homestead, we’ve been raising chickens for years, and while it’s an incredibly rewarding experience, things can go wrong quickly if you’re not prepared.
A friend of ours recently learned this the hard way. Excited about his new chicken-raising adventure, he proudly called to tell me he had ordered 15 baby chicks from a hatchery in New Mexico. But during our conversation, I realized he hadn’t prepared several critical items needed to ensure their survival. Unfortunately, due to his lack of preparation, he lost 60% of his chicks — a devastating and avoidable outcome.
That call inspired me to write this article, in which I’ll break down everything you need to have in place before your chicks arrive.
Coincidentally, we’re about a week away from receiving our next batch of 25 meat birds, so these steps are fresh on my mind.
Here’s a quick overview of the top things to have in place to make sure you’re ready to take care of your baby chicks:
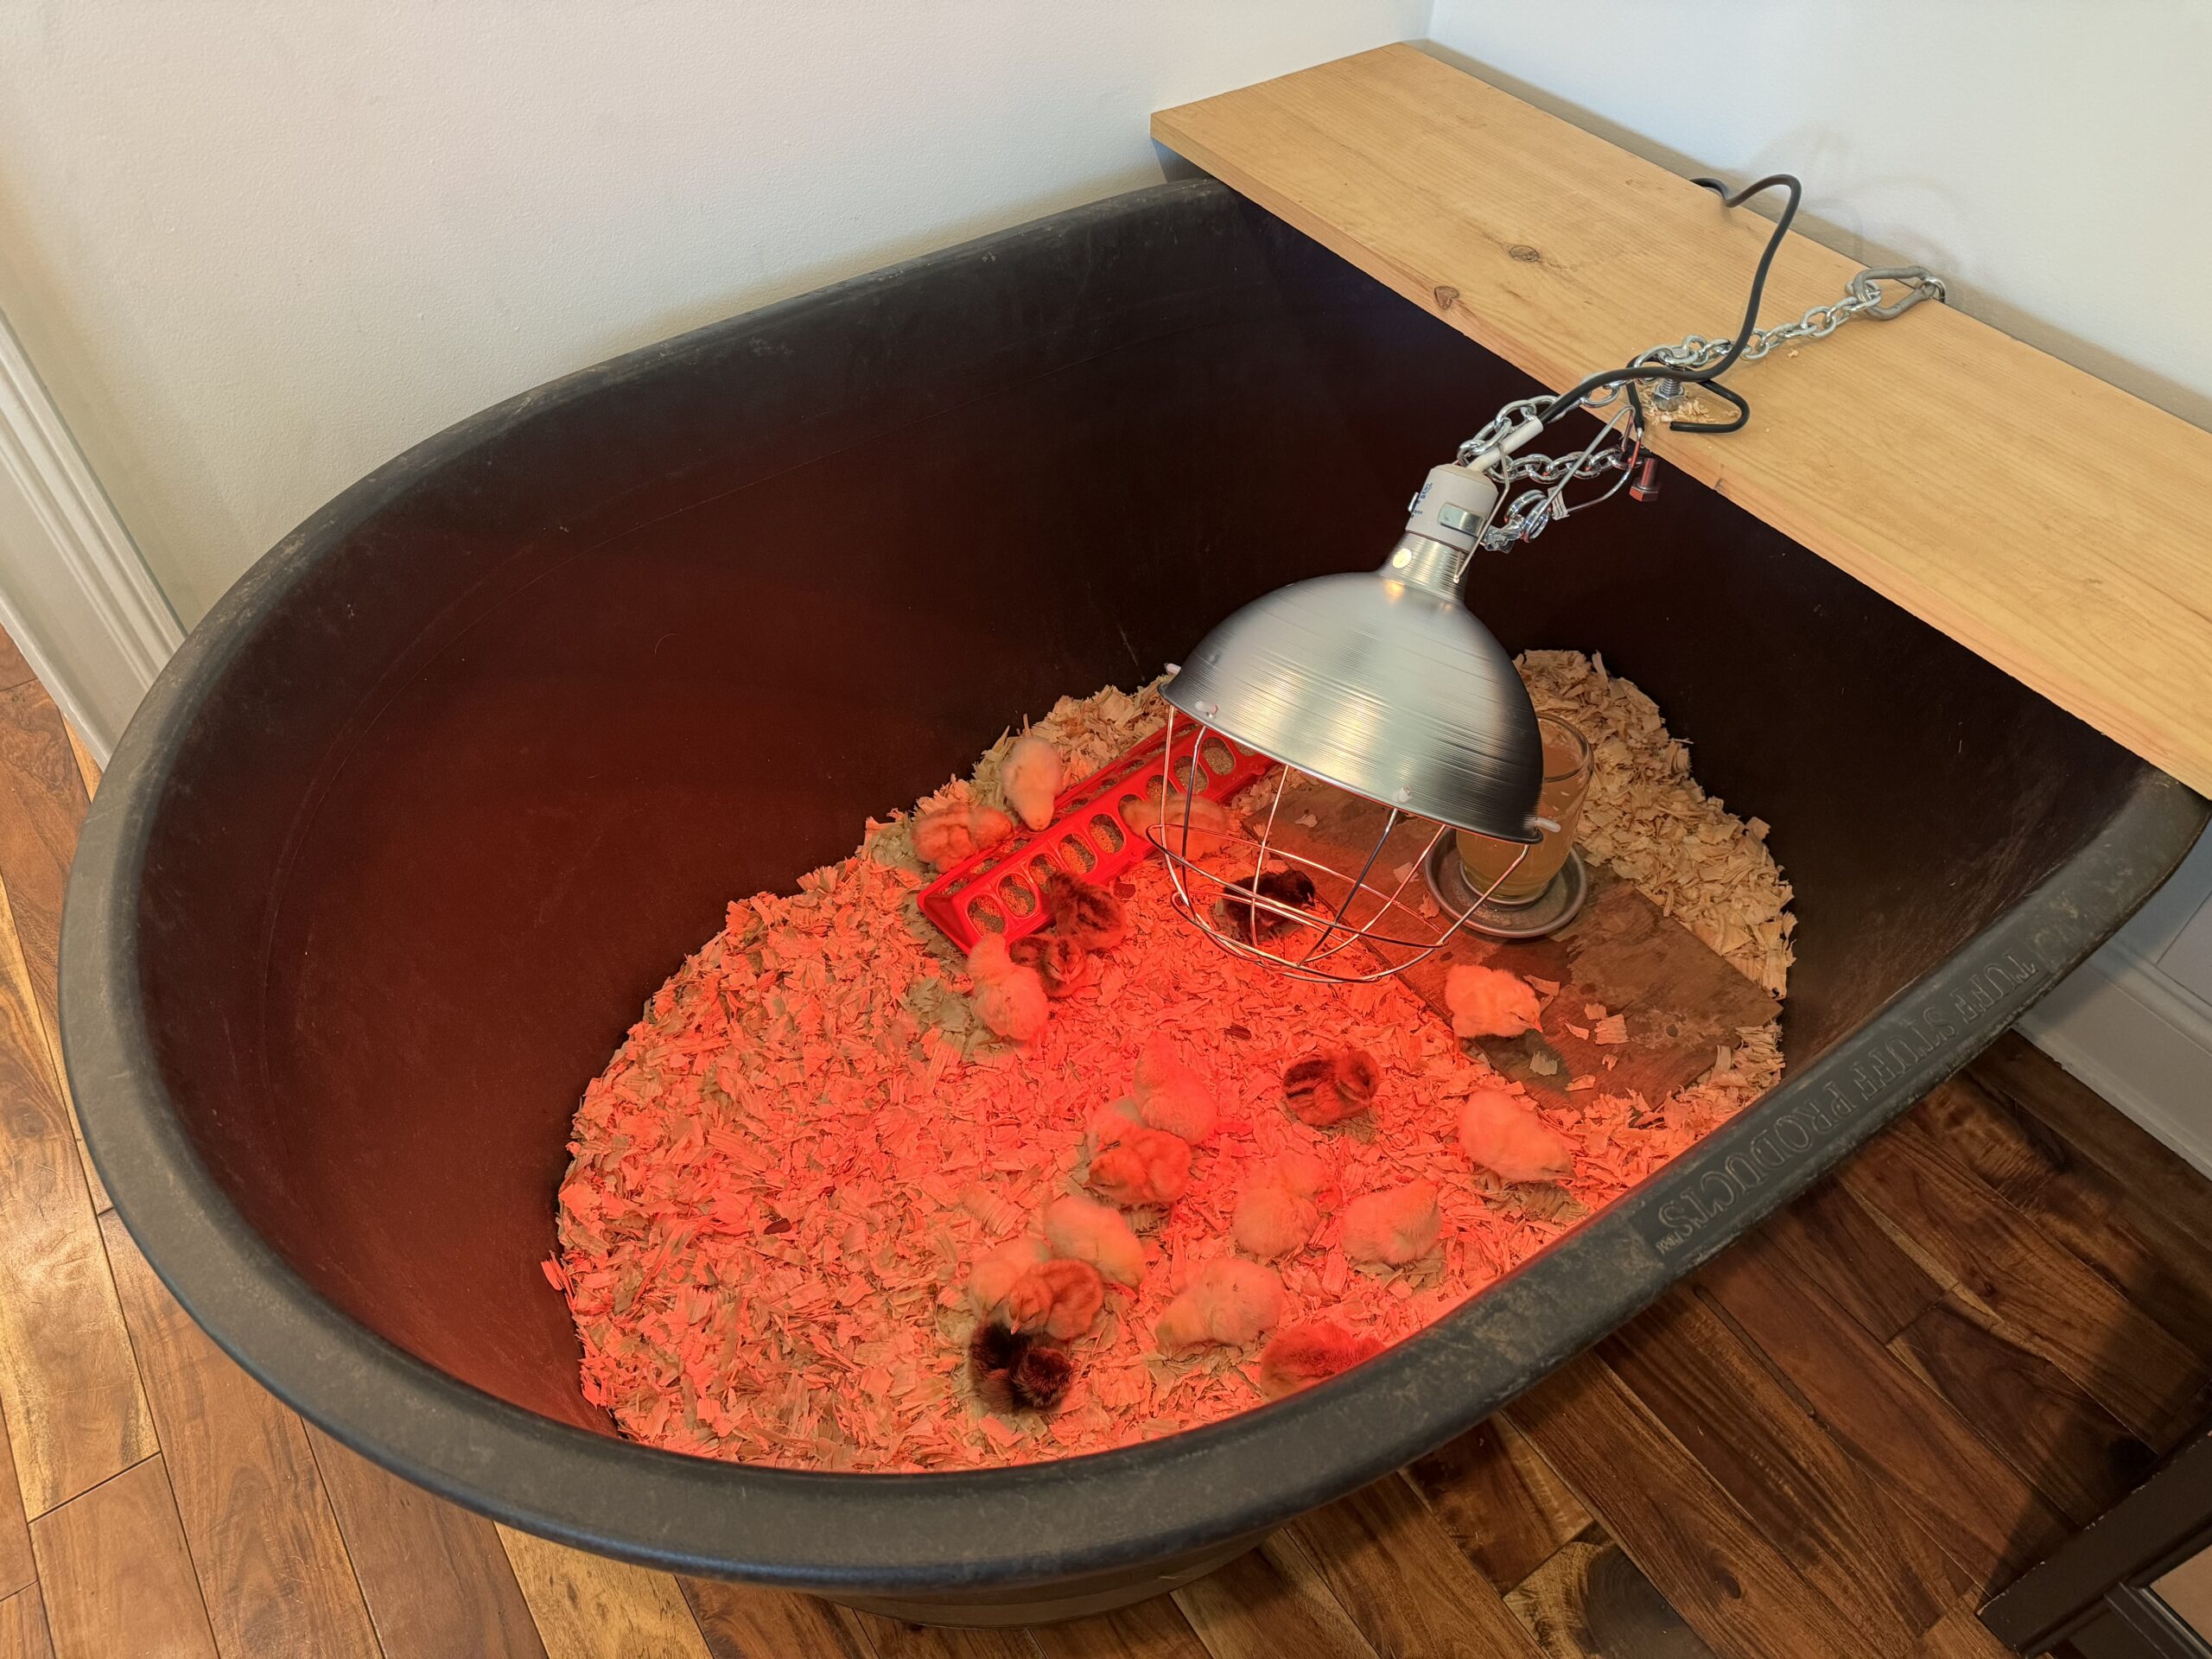
- Brooder. Your chicks need a secure, properly ventilated but non-drafty environment for the first couple of weeks of their lives. Boxes made out of cardboard, plastic, stainless steel or wood all work fine.
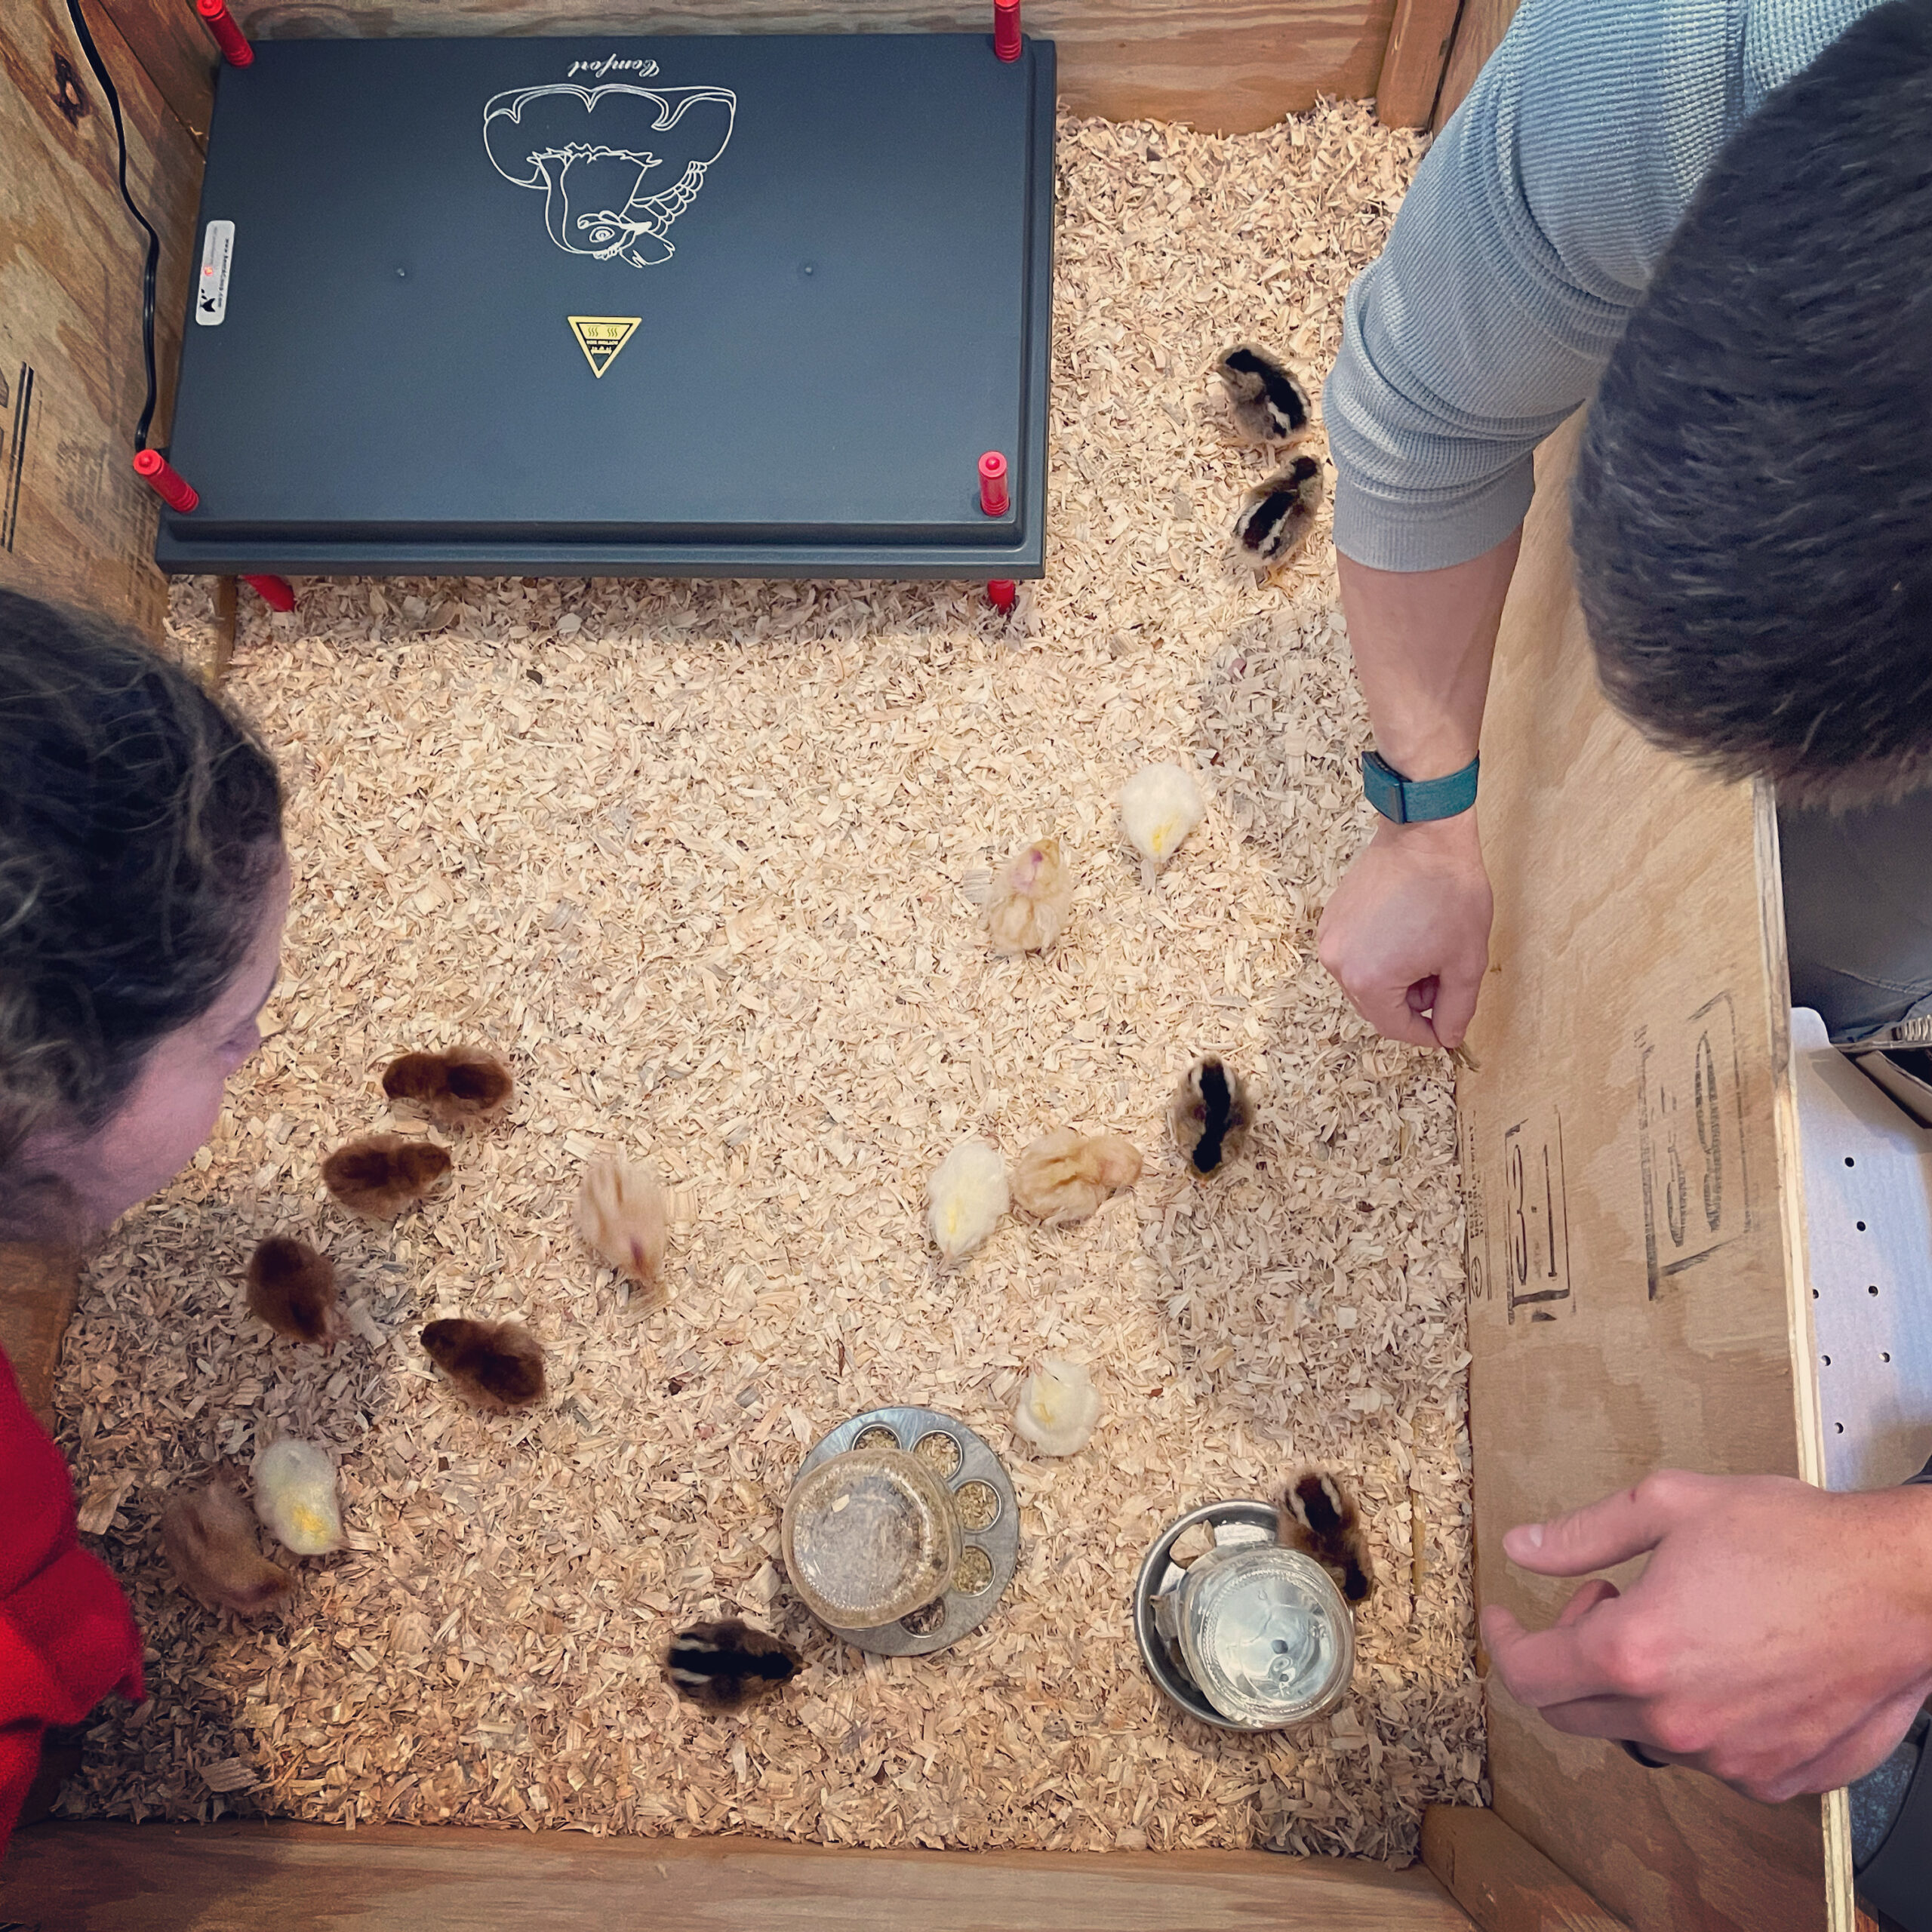
- Bedding. Low-dust bedding made from hemp, wood shavings or paper soaks up manure and prevents chicks from injuring their legs on slippery surfaces.
- Heat. Chicks need a reliable source of heat for the first few weeks. We recommend heating plates or lamps, but either can work. Just ensure the type of light you choose doesn’t disrupt the chicks’ circadian rhythm.
- Feed. Baby chicks need a high-protein diet that includes all the essential vitamins and minerals. We recommend non-medicated, non-GMO, organic feed that’s low in polyunsaturated fatty acids (PUFAs). We use this feed from New Country Organics.
- Water. Baby chicks are prone to drowning, so we recommend nipples instead of bowls.
- Electrolytes and probiotics. To help your chicks recover from the stress of shipping, and to boost their immune system, we recommend giving them filtered water mixed with raw honey, apple cider vinegar and minced garlic (aka “magic water”).
- Feeder. Chicks are messy, so we recommend hanging feeders that they can’t jump (and poop) in.
- Coop. Even though it’ll be a couple of weeks before your chicks move into an outside coop, we recommend having it ready the day they arrive. Time goes by quicker than you think, and the last thing you need is the stress of knowing your chicks have outgrown the brooder and have no other place to be.
While these essentials may seem obvious to seasoned homesteaders, they are absolutely critical for newcomers to have in place before their baby chicks arrive. Unexpected events, such as supply chain disruptions or shipping delays, can leave you without the necessary feed or equipment at the last minute. That’s why we make sure everything is ready weeks in advance, ensuring a smooth and stress-free start for our chicks.
About a week before the baby chicks ship, we go through a checklist and prepare the brooder to ensure there won’t be any surprises when the Post Office calls and notifies us that our chicks are ready to be picked up.
So let’s get into the details and best practices for each of the eight items mentioned above.
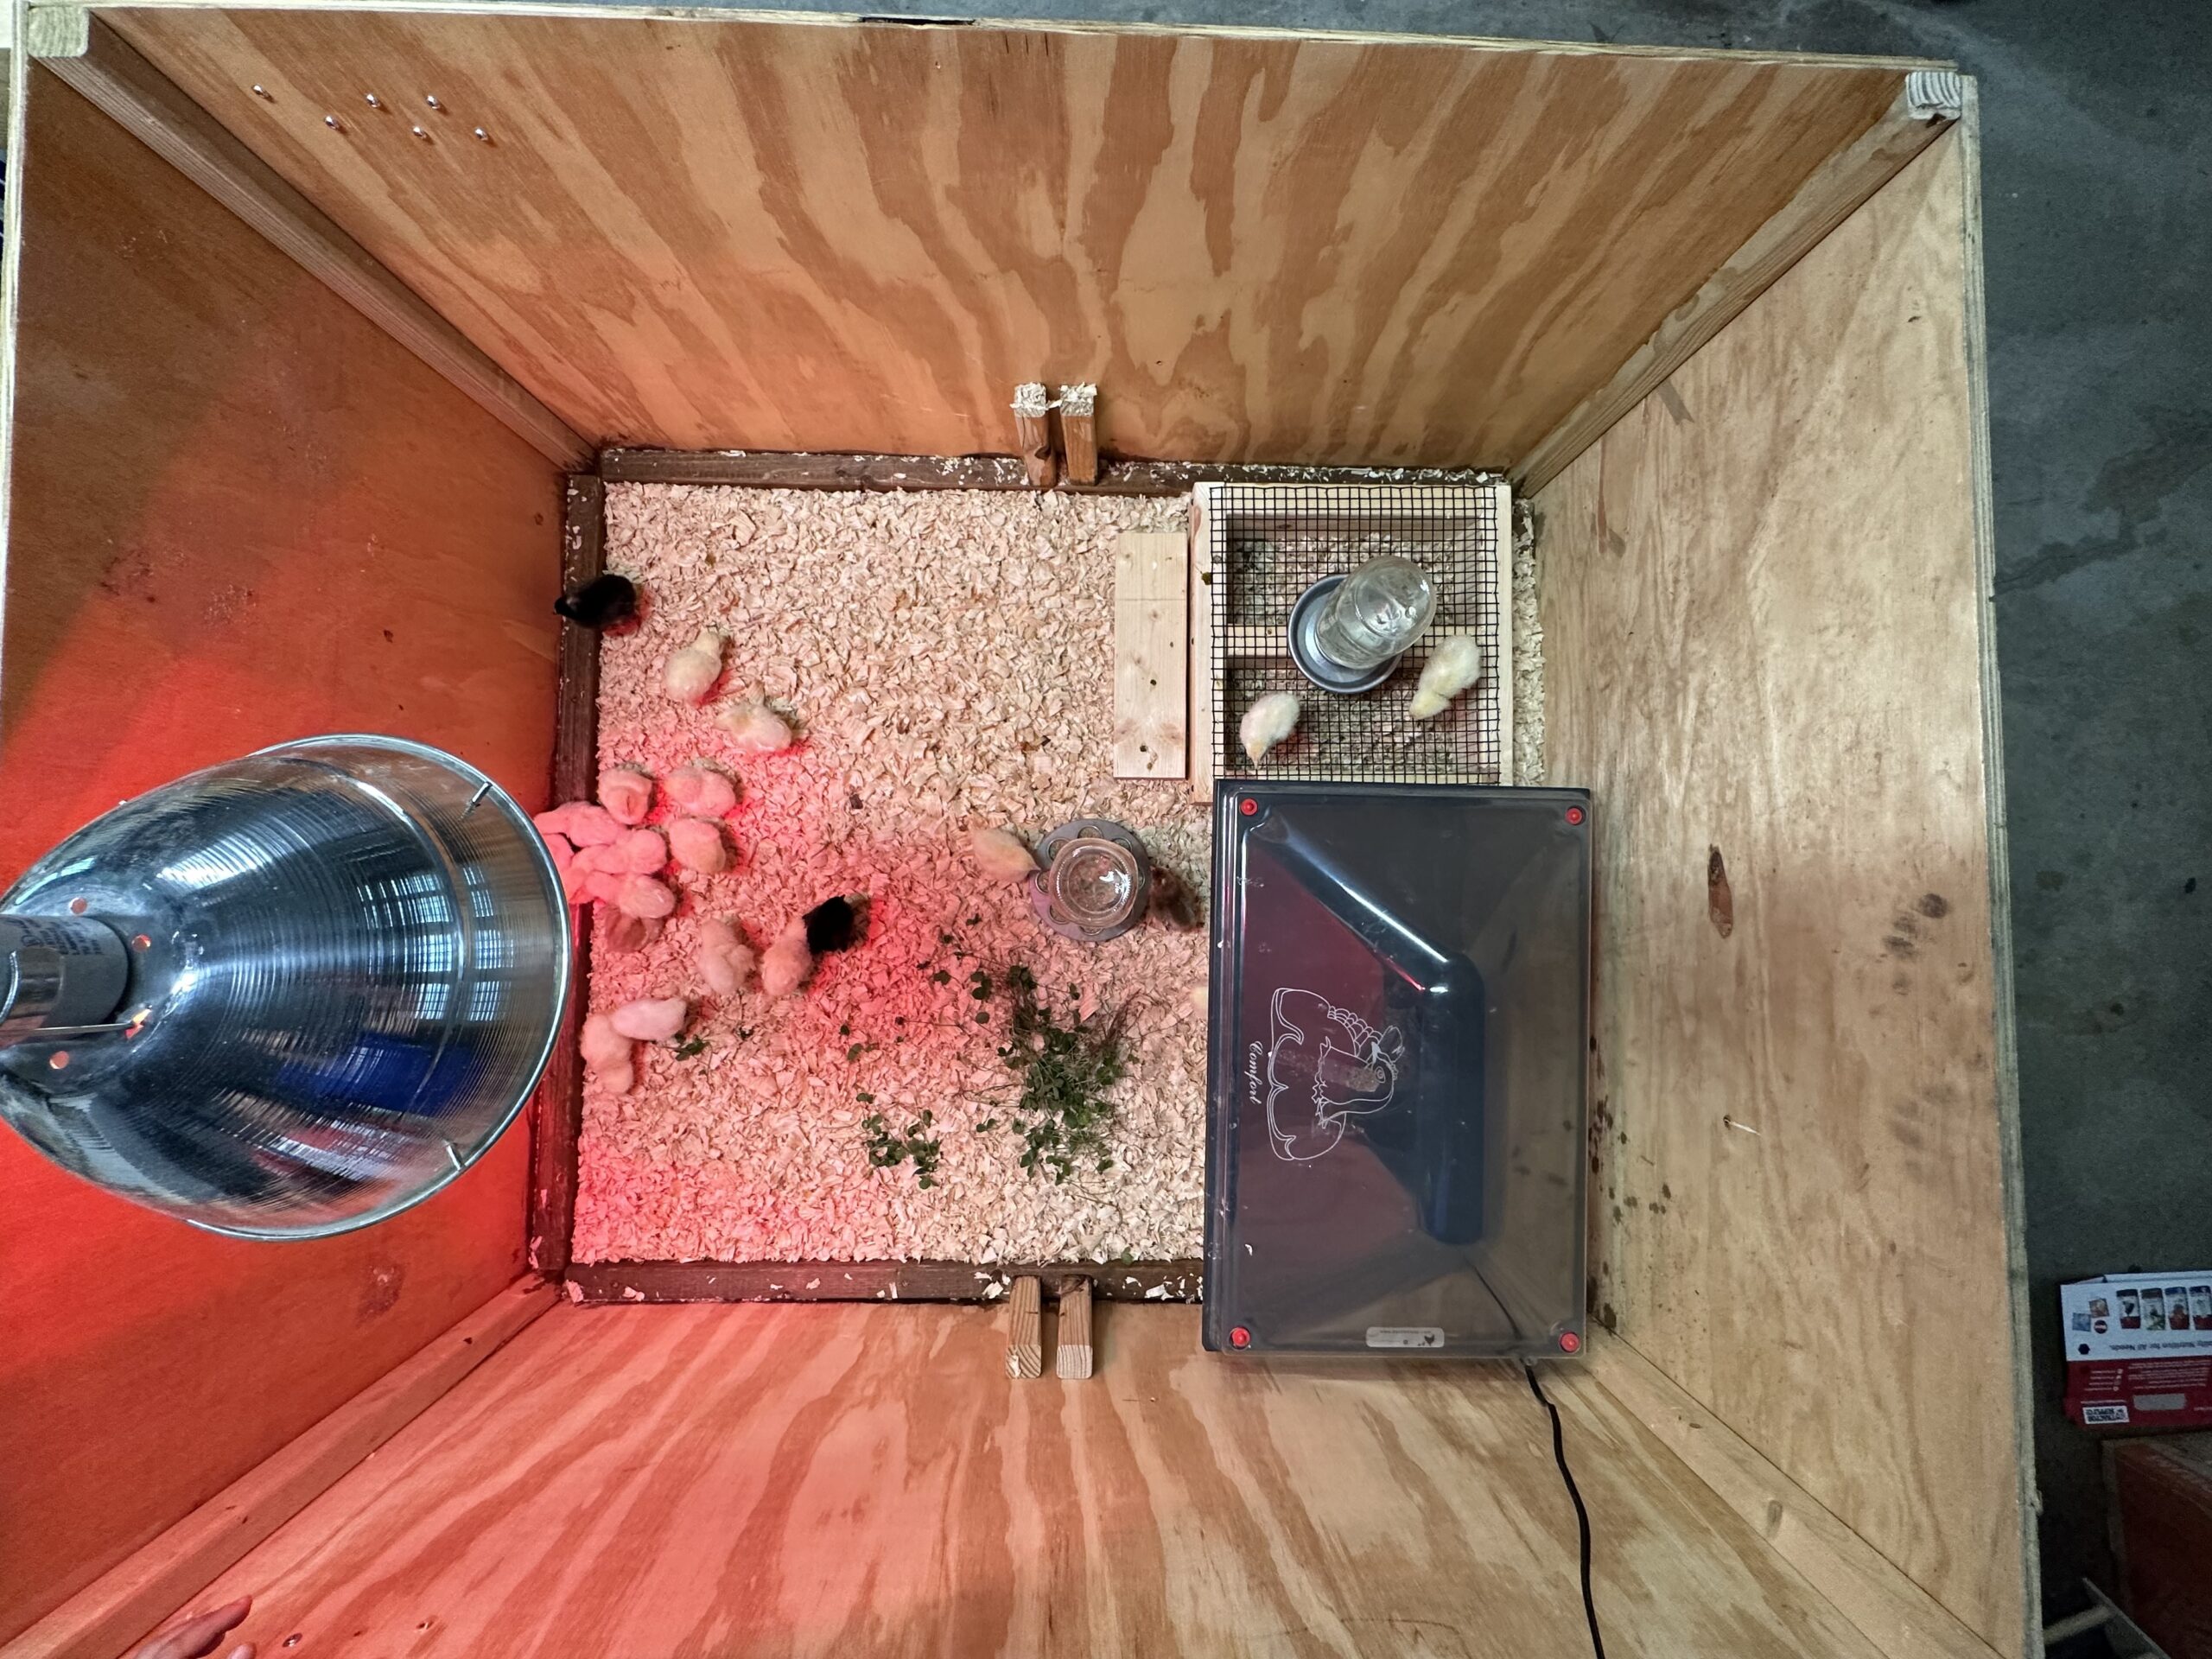
1. Brooder: The First Home For Your Chicks
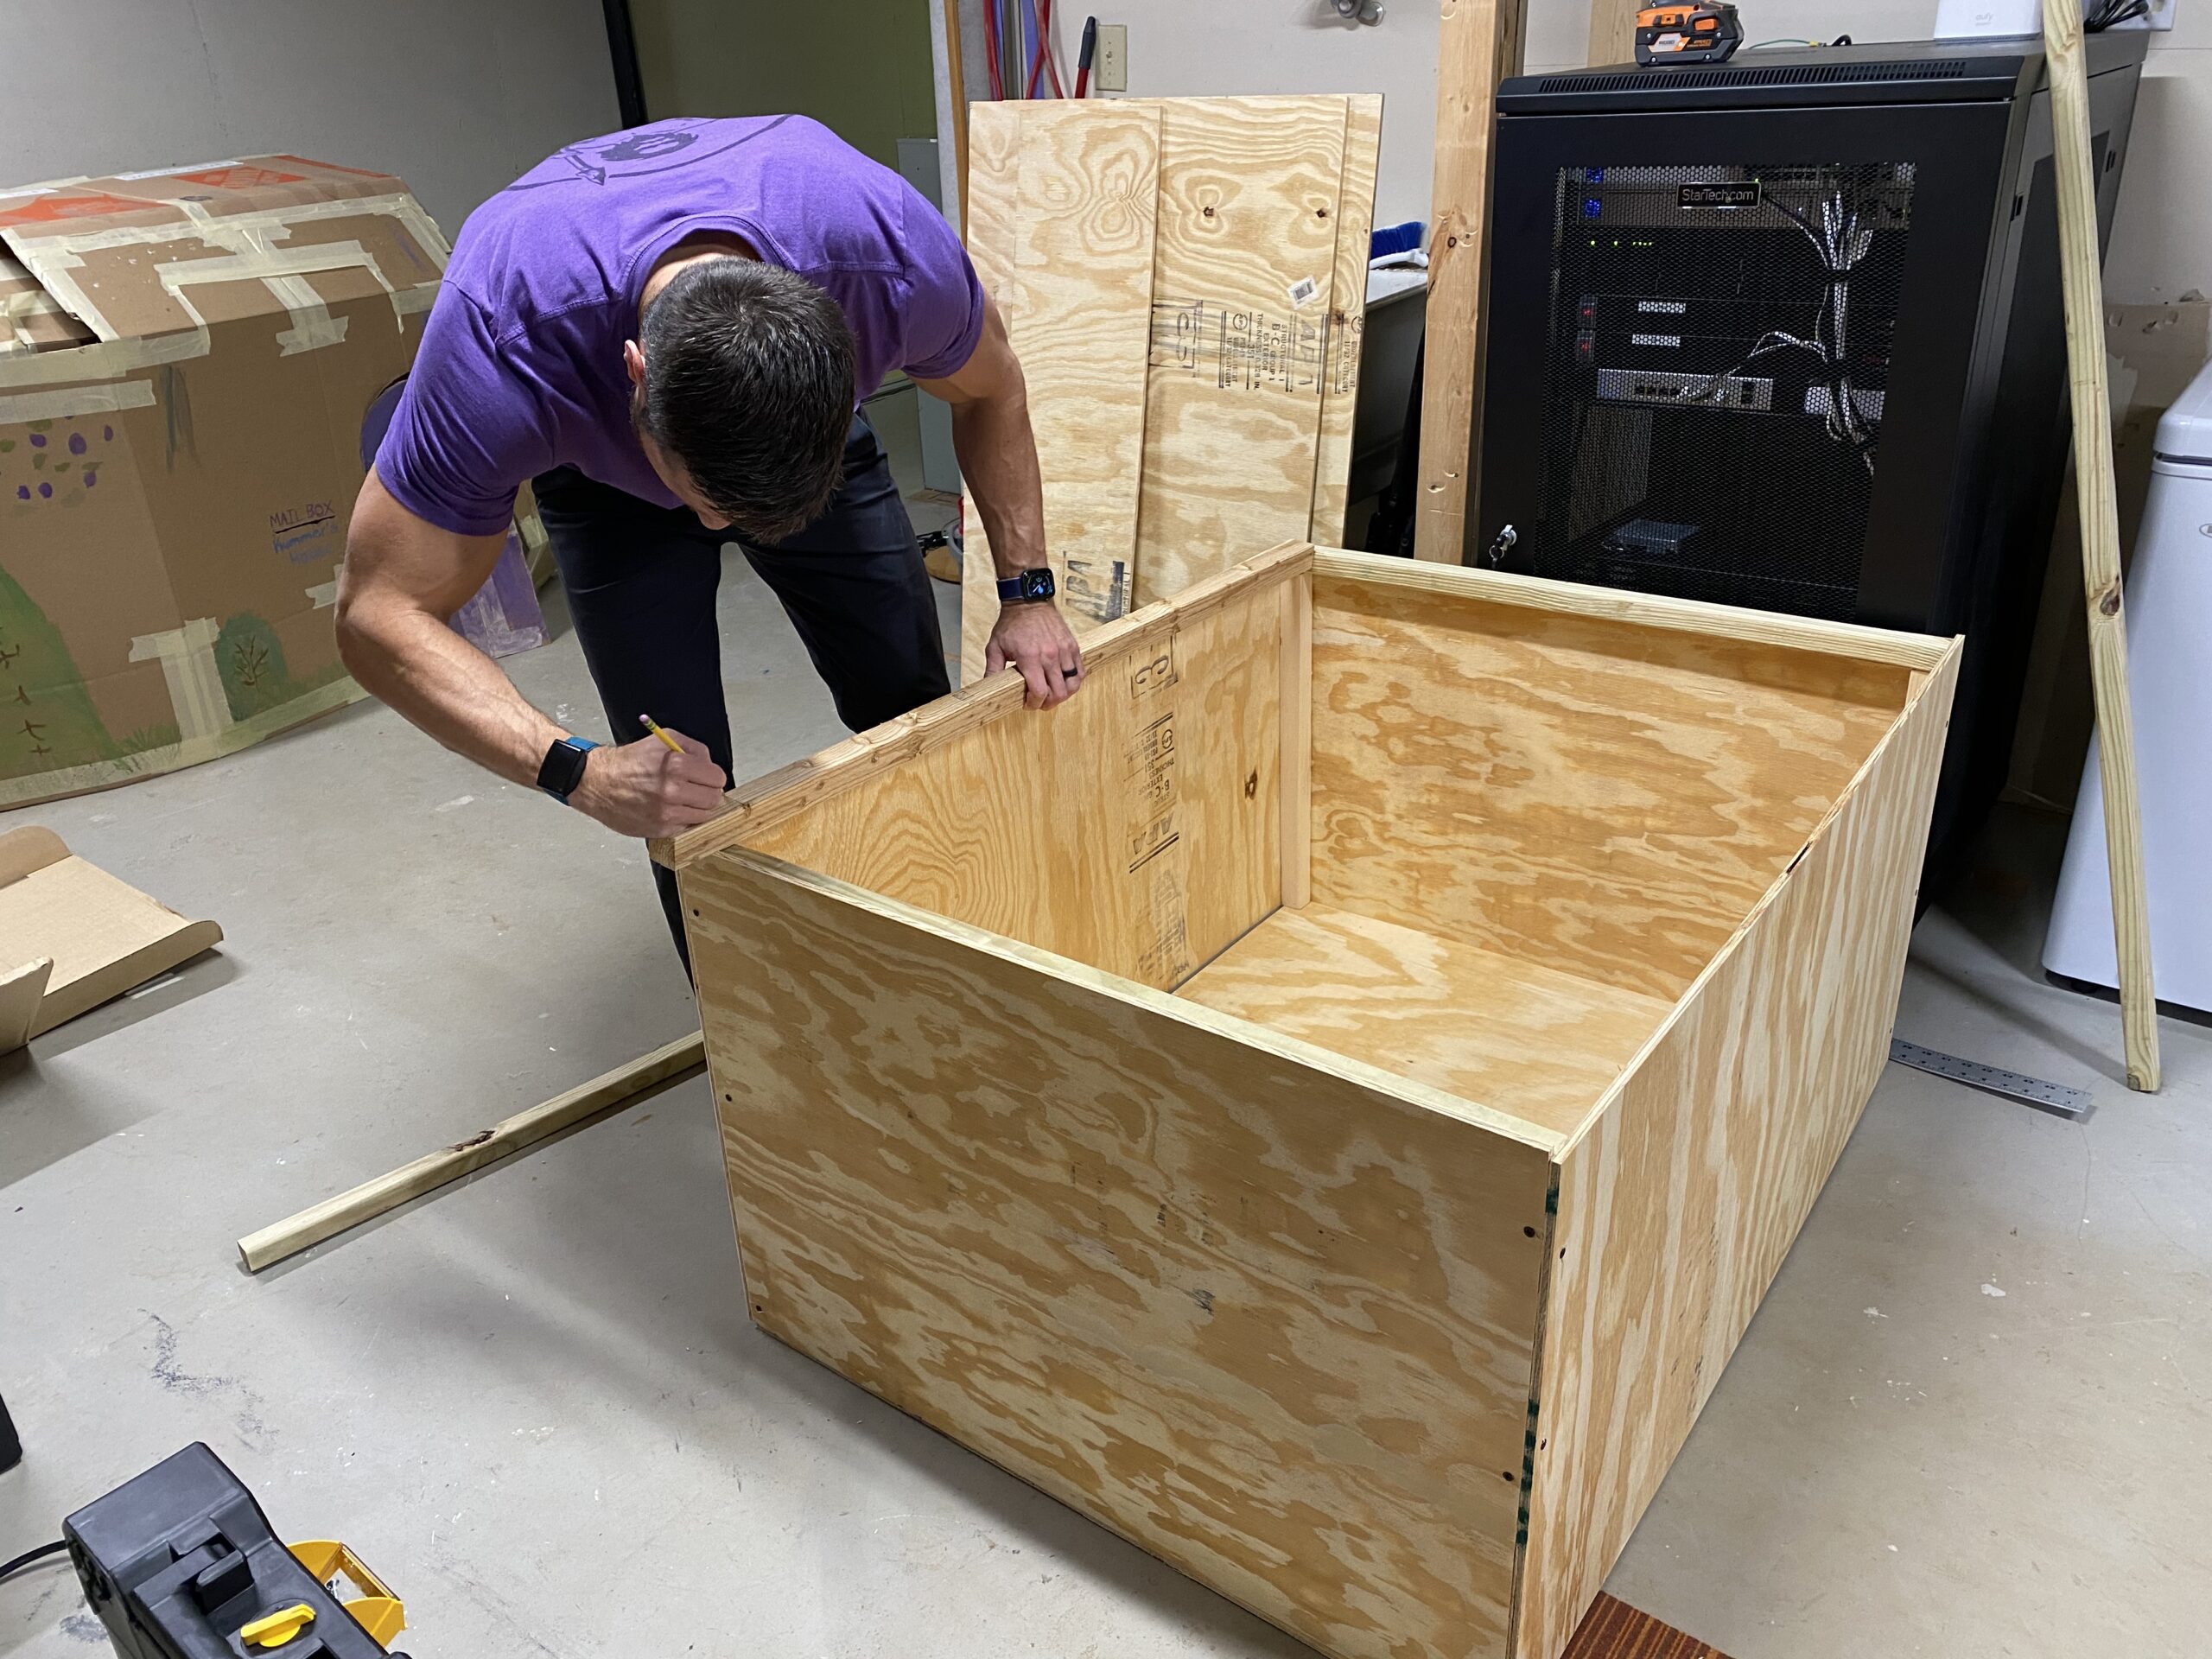
The brooder is the first and most important thing you need before your chicks arrive from the hatchery. It provides warmth, security, and protection from predators, pets and drafts.
At the Kummer Homestead, we built a mobile brooder with a removable lid, which we can move between the garage and the backyard. This setup has several advantages.
For example, raising chicks indoors is convenient, but it creates a lot of dust and odor. By moving our brooder outside during the day, we give our chicks access to natural sunlight, which is critical for their development, and we keep our garage cleaner.
The brooder should be big enough to give the chicks space to move away from the heat source if they need to, but not so large that they get lost or struggle to find their food and water. And keep in mind that if it’s too deep, it can make catching them more difficult, which is frustrating when you need to check on them.
Chicks only need to stay in the brooder for a couple of weeks. If the weather allows, we move ours to a mobile chicken tractor within two weeks so they can start foraging on fresh pasture while staying safe from predators.
For more brooder tips and tricks, check out this video.
2. Bedding: Choosing the Best Material
Bedding plays a huge role in keeping your chicks clean, healthy and comfortable. We use kiln-dried pine shavings because they’re:
- Low dust, which is important for respiratory health, as excessive dust can cause lung irritation.
- Absorbent. Chickens poop a lot, and pine shavings do a great job of soaking up moisture.
- Inexpensive and widely available. Compared to hemp or shredded paper, they’re often more affordable.
Instead of cleaning out the brooder every few days, we use the deep litter method. This involves adding fresh bedding on top of soiled bedding, allowing the lower layers to break down naturally. This method reduces odor, keeps the brooder drier, and provides a compostable material when the chicks move out. (At the end of the brooder cycle, we dump the bedding into our compost pile, where it turns into nutrient-rich fertilizer.)
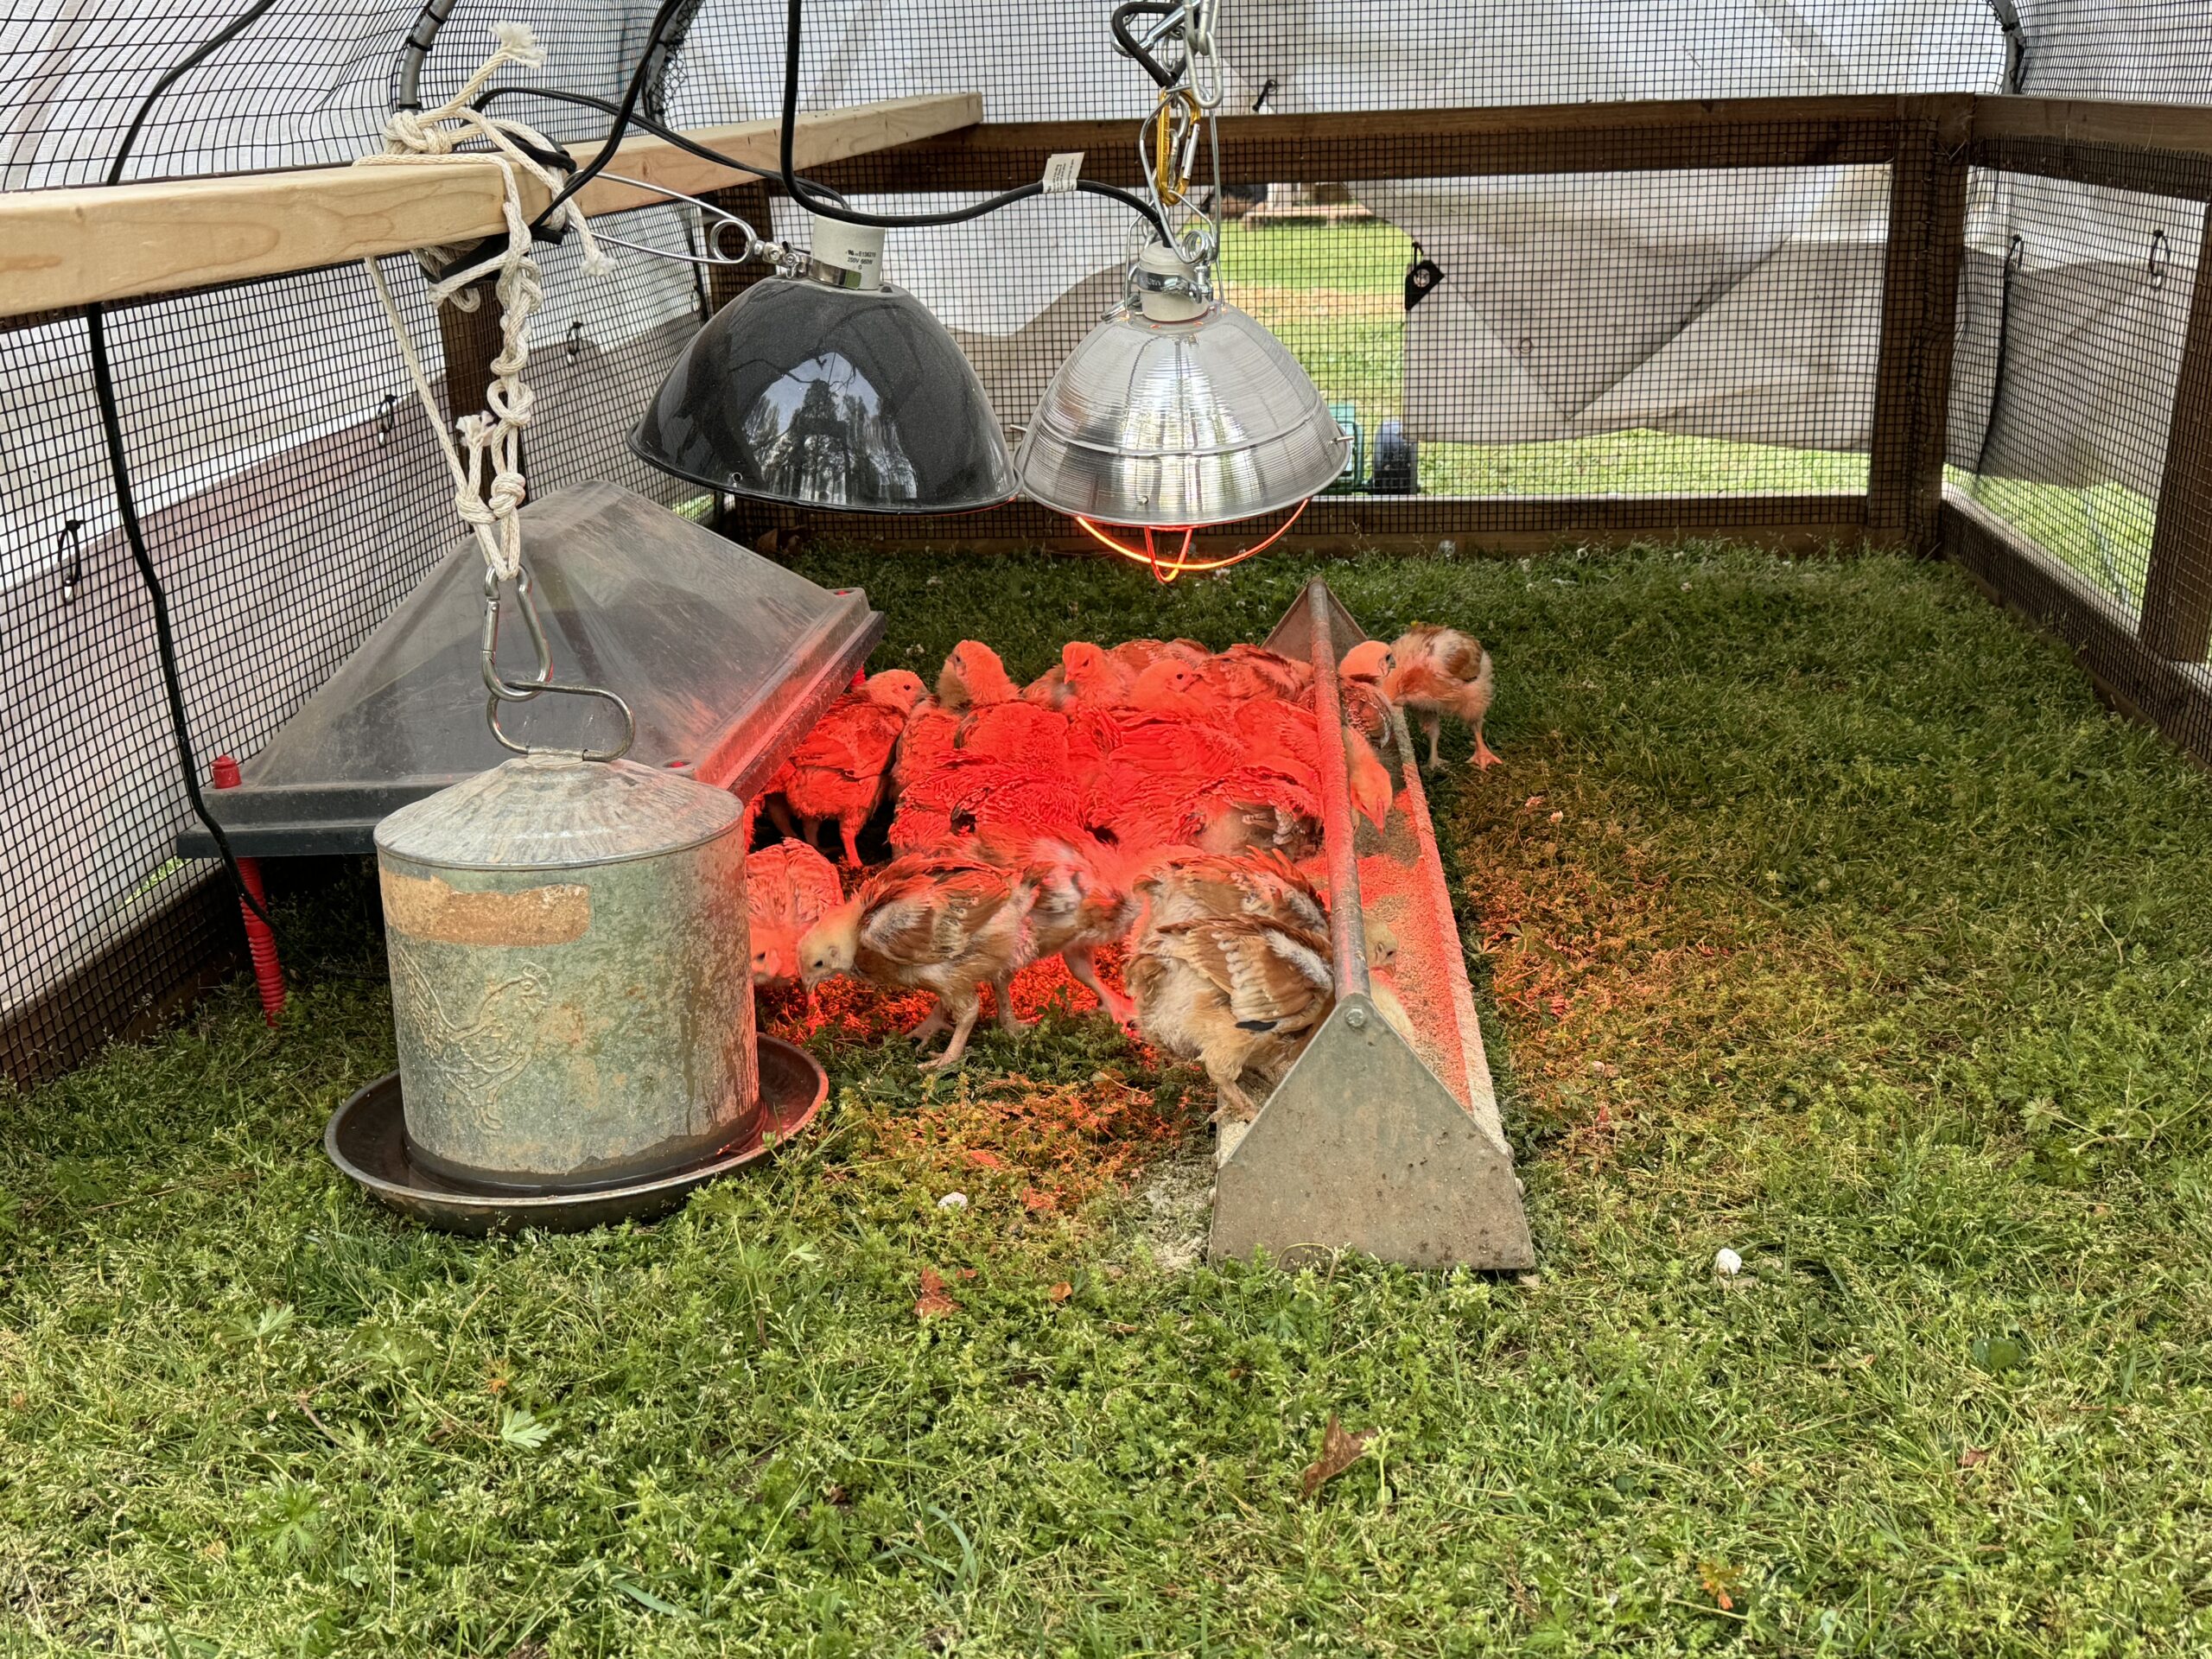
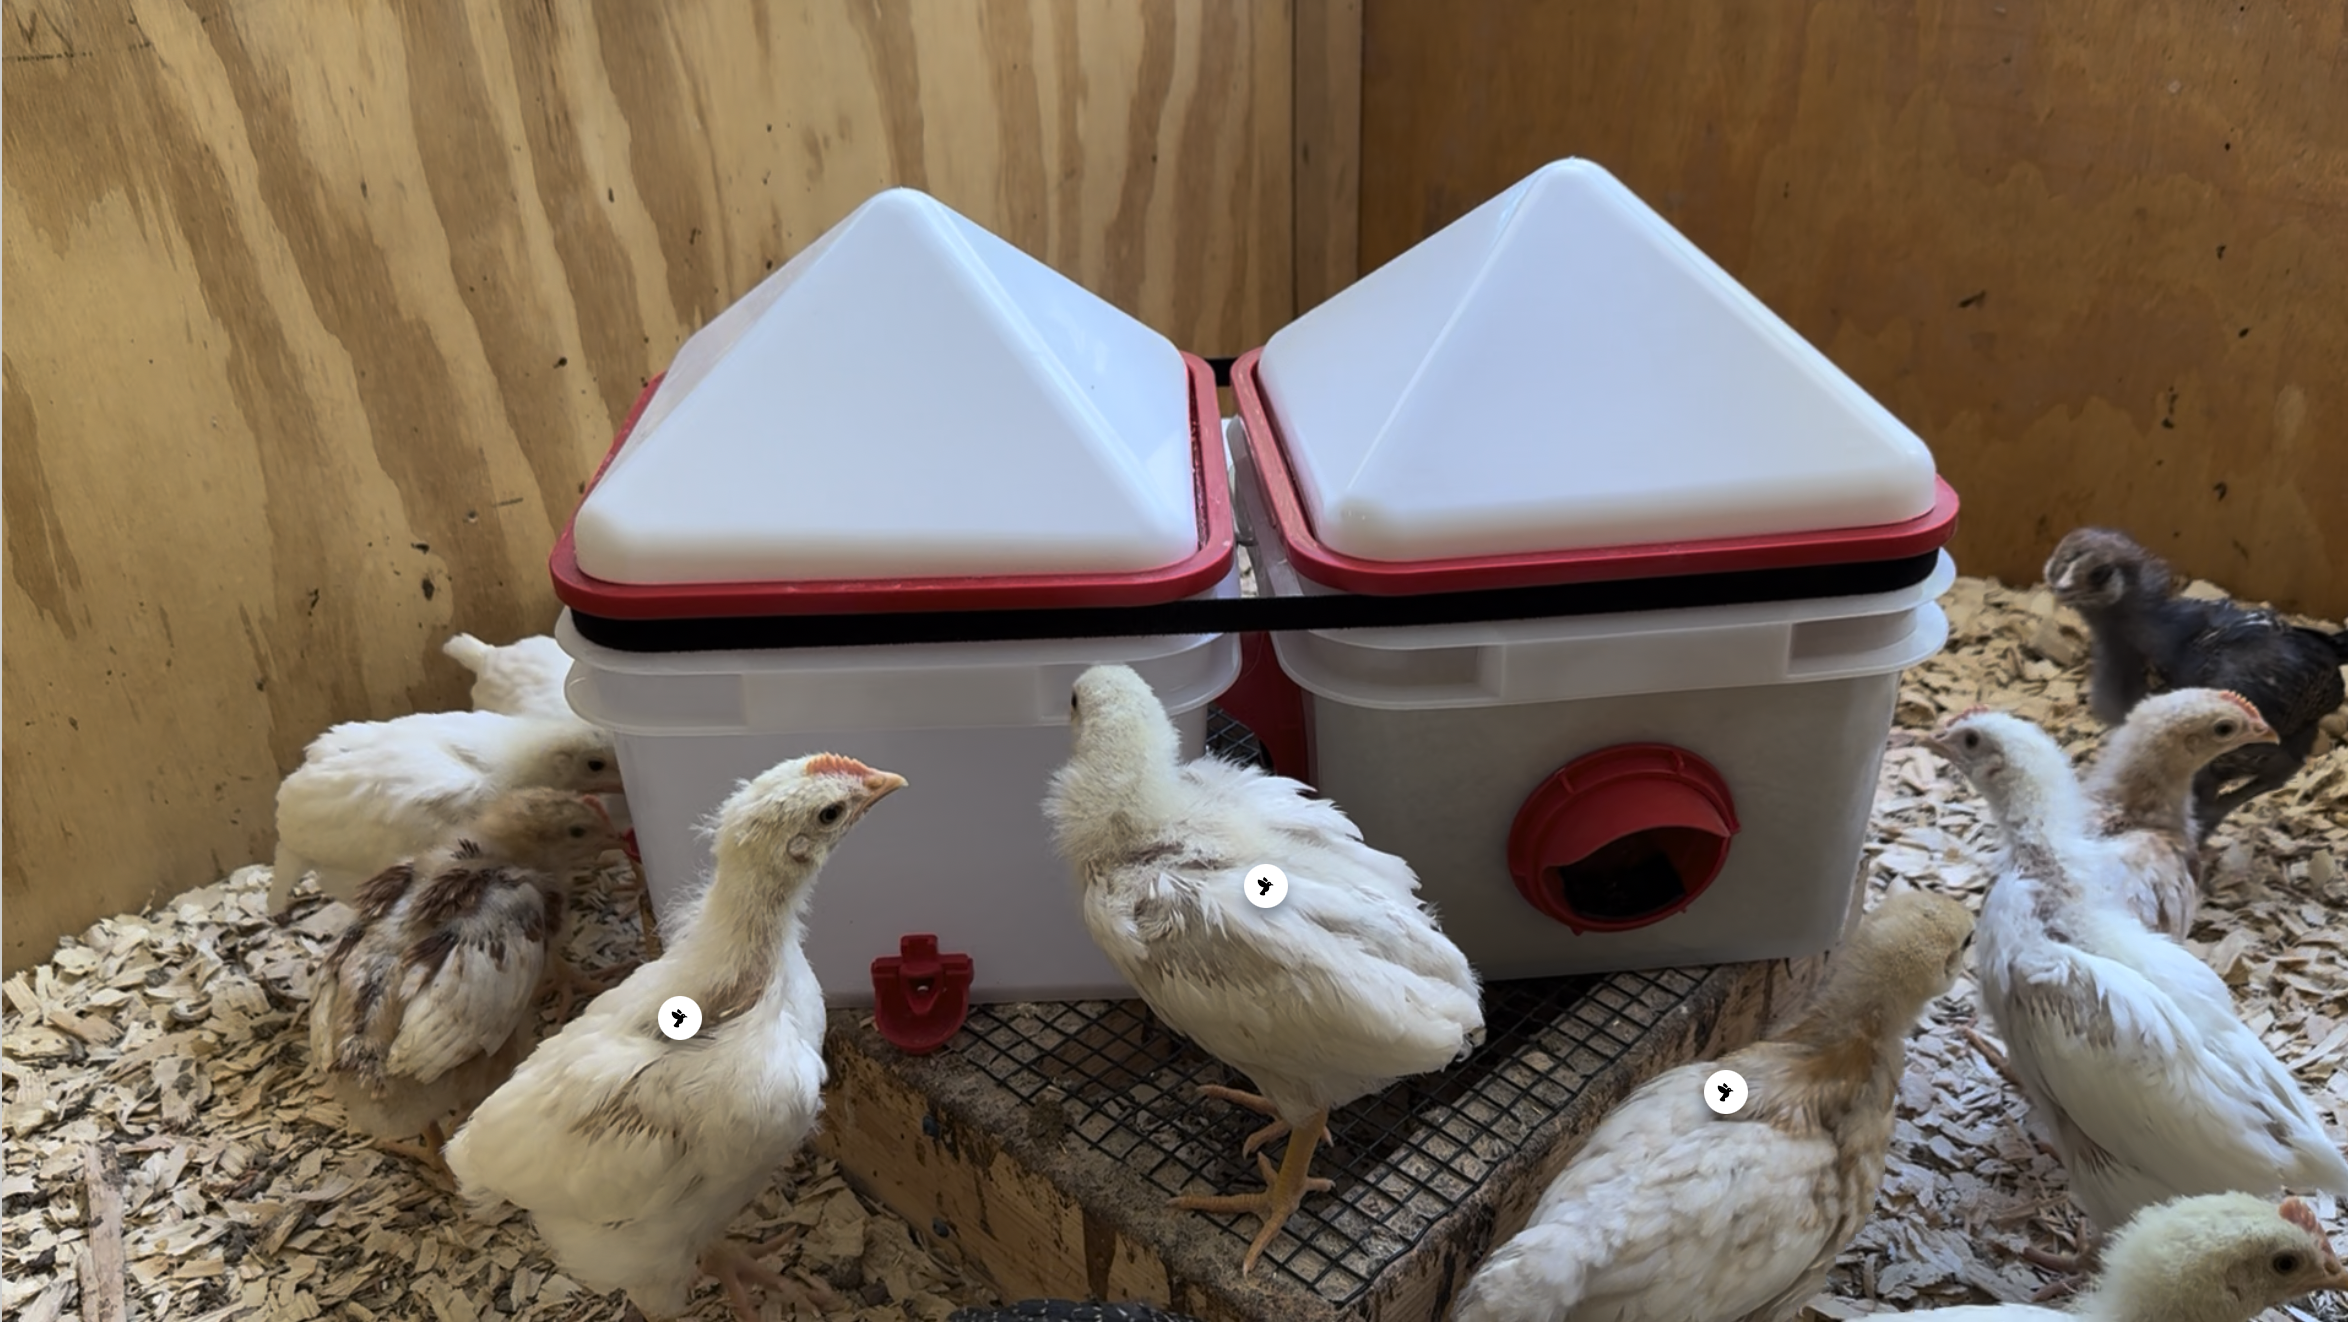
3. Heating: Why We Prefer Heating Plates
Baby chicks can’t regulate their body temperature at first, so a consistent heat source is essential. While many beginners use heat lamps (like this one), we’ve found that heating plates are a safer and more efficient option.
Here’s why we recommend heating plates over lamps:
- They carry no fire risk. Heat lamps get extremely hot and can ignite bedding if knocked over.
- They’re energy efficient and consume less electricity compared to a heat lamp that runs 24/7.
- They support natural behavior. Heating plates mimic a mother hen’s warmth, allowing chicks to huddle under them as needed without disrupting their sleep cycle.
Here’s a good heating plate option on Amazon.
If you do use a heat lamp, use a red or infrared bulb at night. White light disrupts chicks’ circadian rhythm, leading to stressed and sleep-deprived birds.
Also, when we relied on heat lamps, we used a thermometer and laser temp gun to ensure our brooder was at the right temperature, starting at 95° F and decreasing by 5° F each week.
4. Feeding: Why Feed Quality Matters
Chickens, like all monogastric animals, are what they eat. In other words, their feed directly impacts their health and the nutritional quality of their eggs and meat. That’s why choosing the appropriate feed depending on their stage of development is critical.
- 0 to 4 weeks — use starter feed. This is high in protein (20-22%) to support rapid growth and feather development.
- 5 weeks to butchering (or when they start laying eggs) — use grower feed. Slightly lower in protein (16-18%) to sustain steady growth without excessive weight gain.
- 18+ weeks — use layer feed. Contains added calcium to support eggshell production (this is only needed for laying hens).
At the Kummer Homestead, we use organic, non-GMO, soy-free and corn-free, low-PUFA feed from New Country Organics. Many commercial feeds are loaded with cheap fillers, unhealthy fats and artificial additives — all of which negatively affect the quality of the birds’ eggs and meat.
This is especially important for meat birds, as their diet directly influences the fatty acid composition of their meat. You can learn more about how feed impacts the fatty acid composition of meat birds in our article about why you should stop raising Cornish Cross chickens for meat.
A common misconception is that table scraps can replace chick feed. While chickens love to eat kitchen scraps, those scraps alone are not nutritionally balanced for growing chicks. Keep in mind that unlike the red jungle fowl chickens are descendents of, modern egg layers require nutrient-dense fuel to grow and thrive.
In other words, I recommend investing in high-quality starter feed and saving table scraps for when your chickens are over a month old.
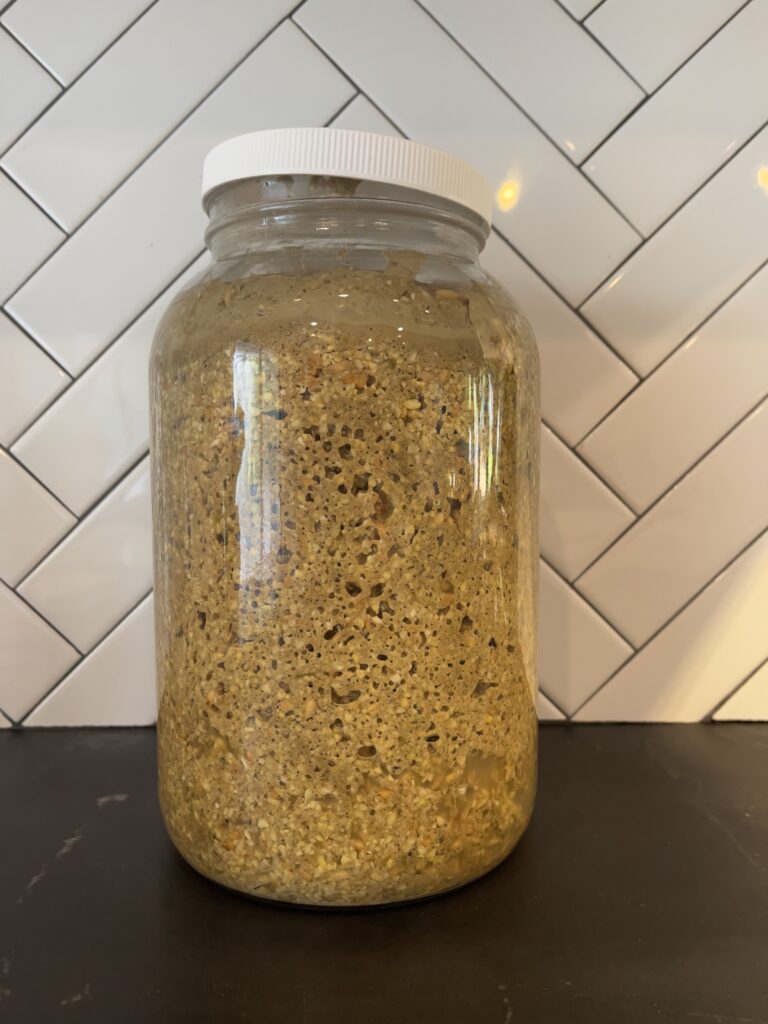
Once our chicks transition to grower feed, we ferment their feed to improve digestion and reduce overall feed costs. Fermenting makes the nutrients more bioavailable, improves their gut health, and helps them absorb more nutrition from less feed.
To ferment chicken feed, we use food-grade 5-gallon buckets and fill them one-third with feed. Then we add filtered water (the chlorine in regular tap water can kill beneficial bacteria required for fermentation) to fully submerge the feed and let it rest at room temperature for three days. After that, it’s ready to use.
5. Watering: Keeping It Clean and Safe
Everyone knows that water is critical for chicks, but improper watering setups are one of the most common causes of chick fatalities.
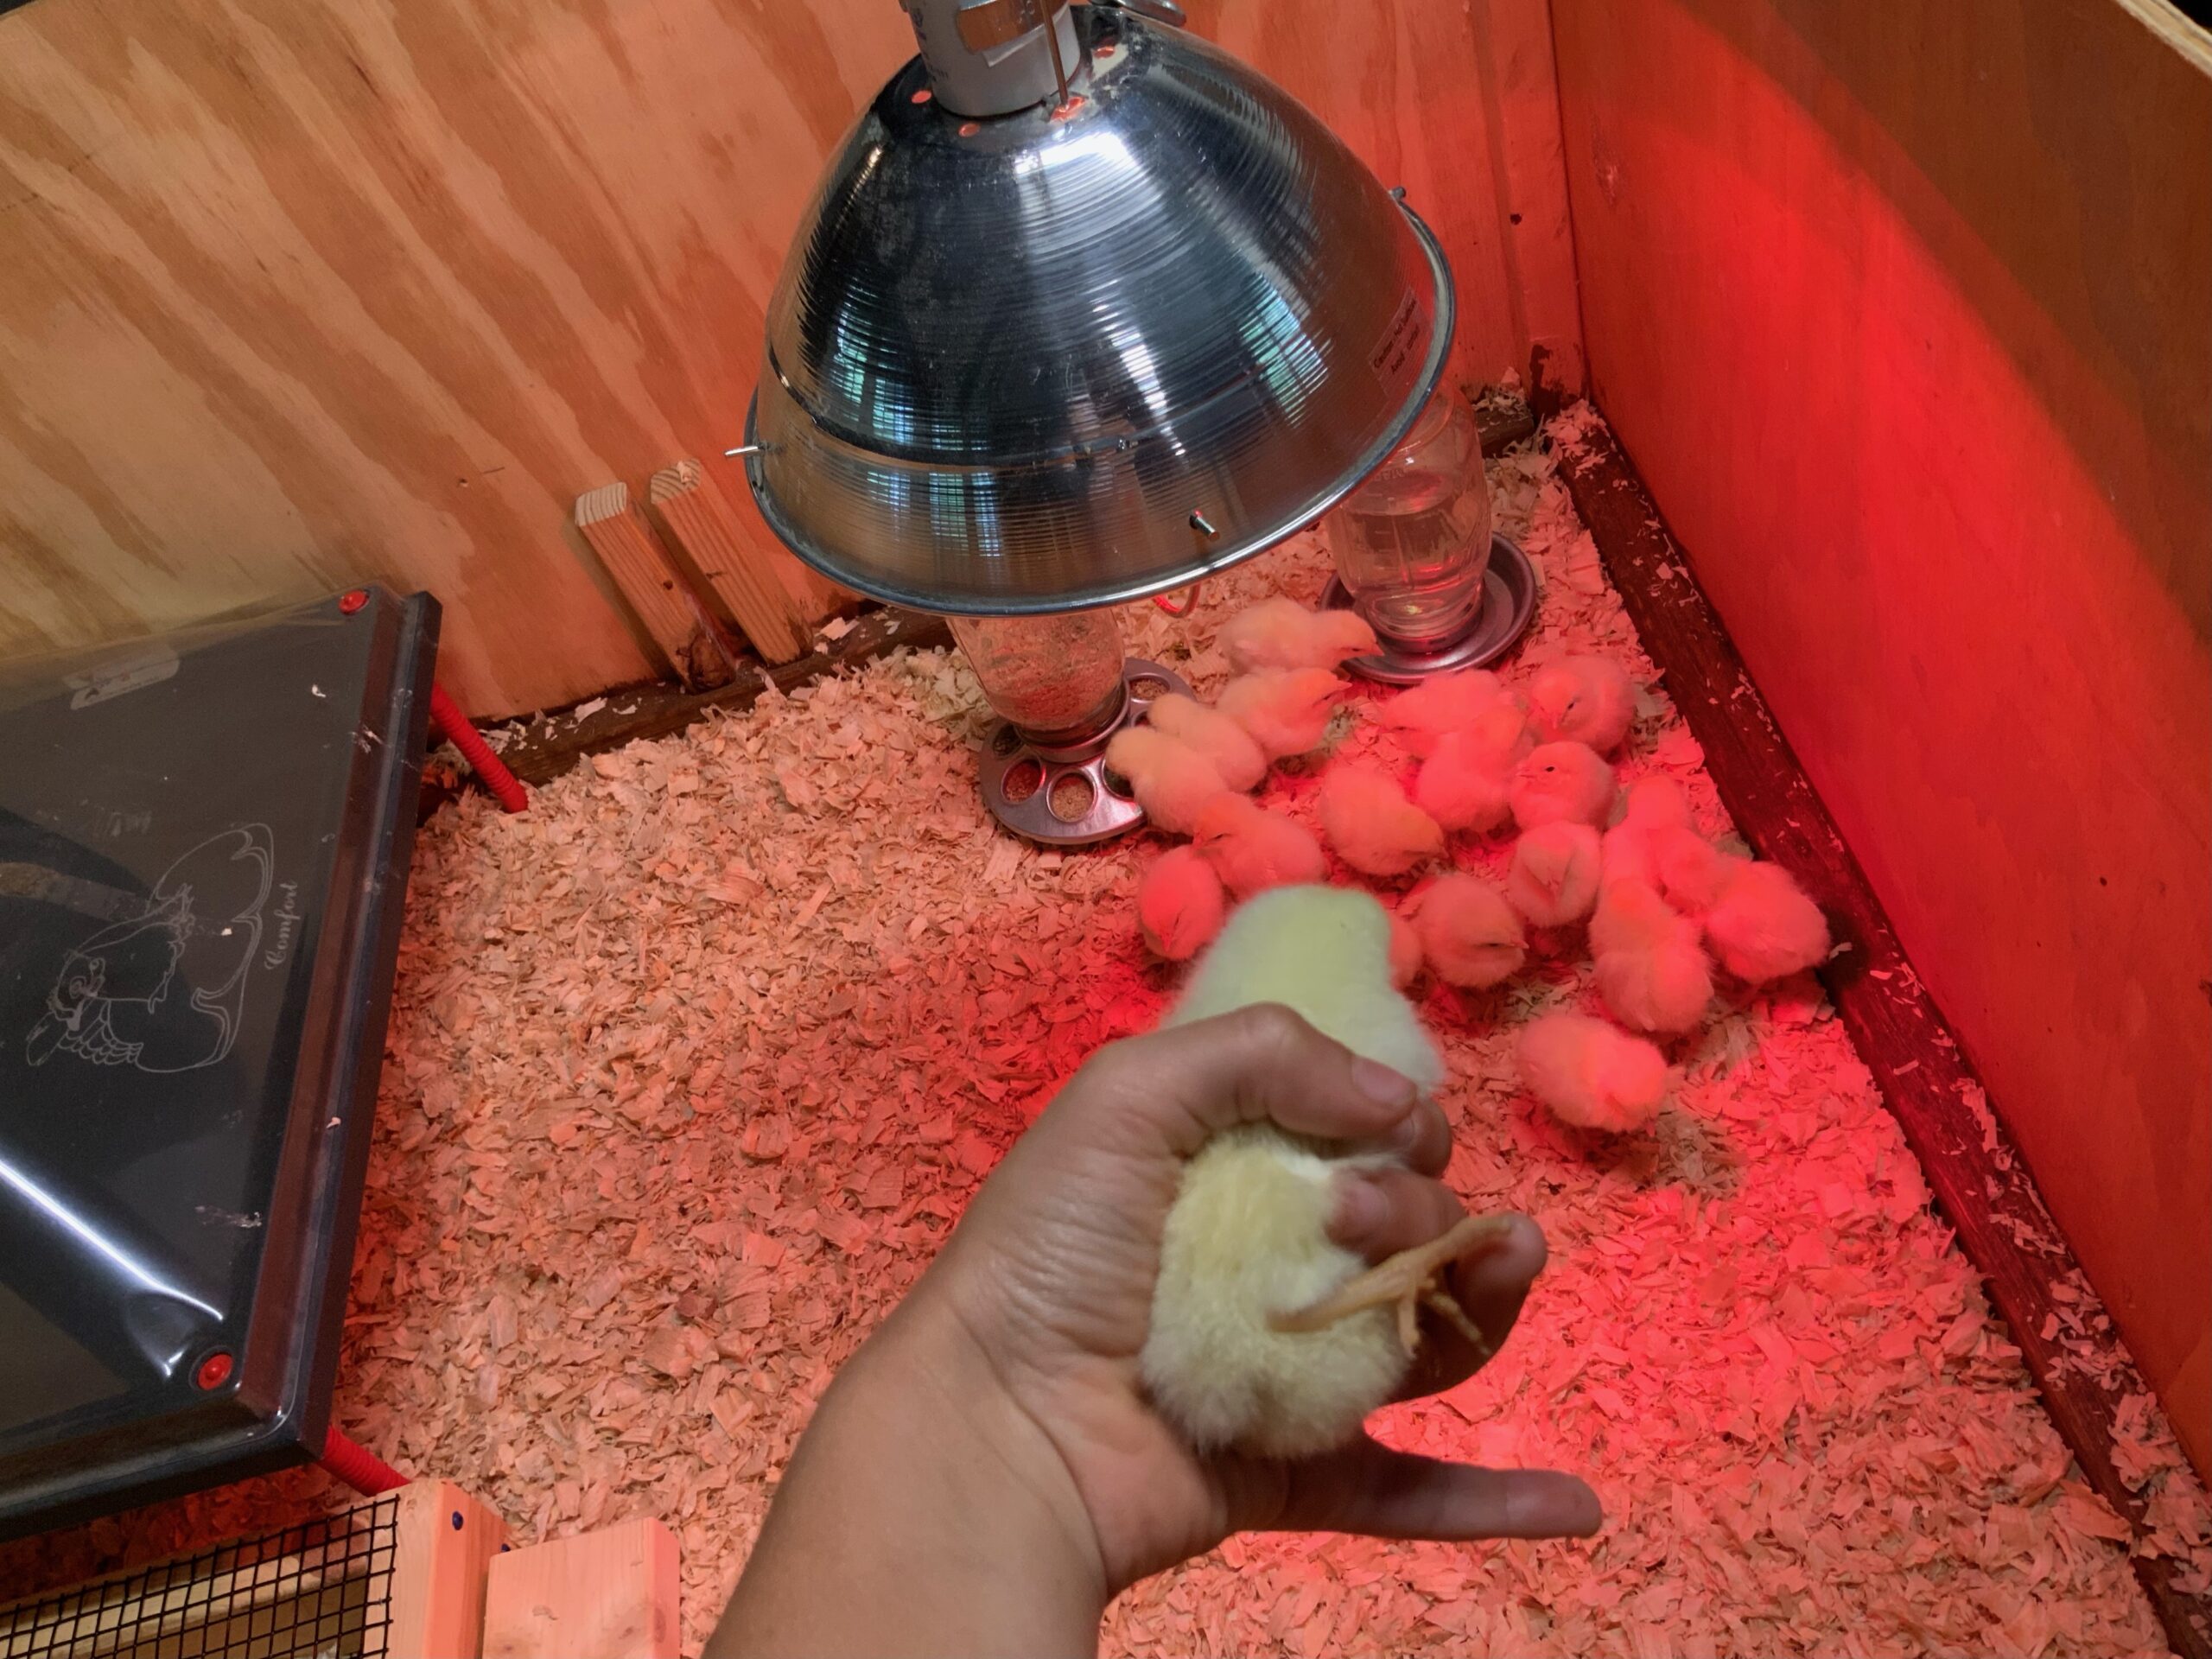
New chicks are clumsy and can easily drown in improperly sized waterers, so setting up a safe and sanitary system is crucial. For the first few days, we use small dishes that screw onto an upside-down mason jar. This setup prevents the chicks from getting too wet while ensuring they can easily find and access the water.
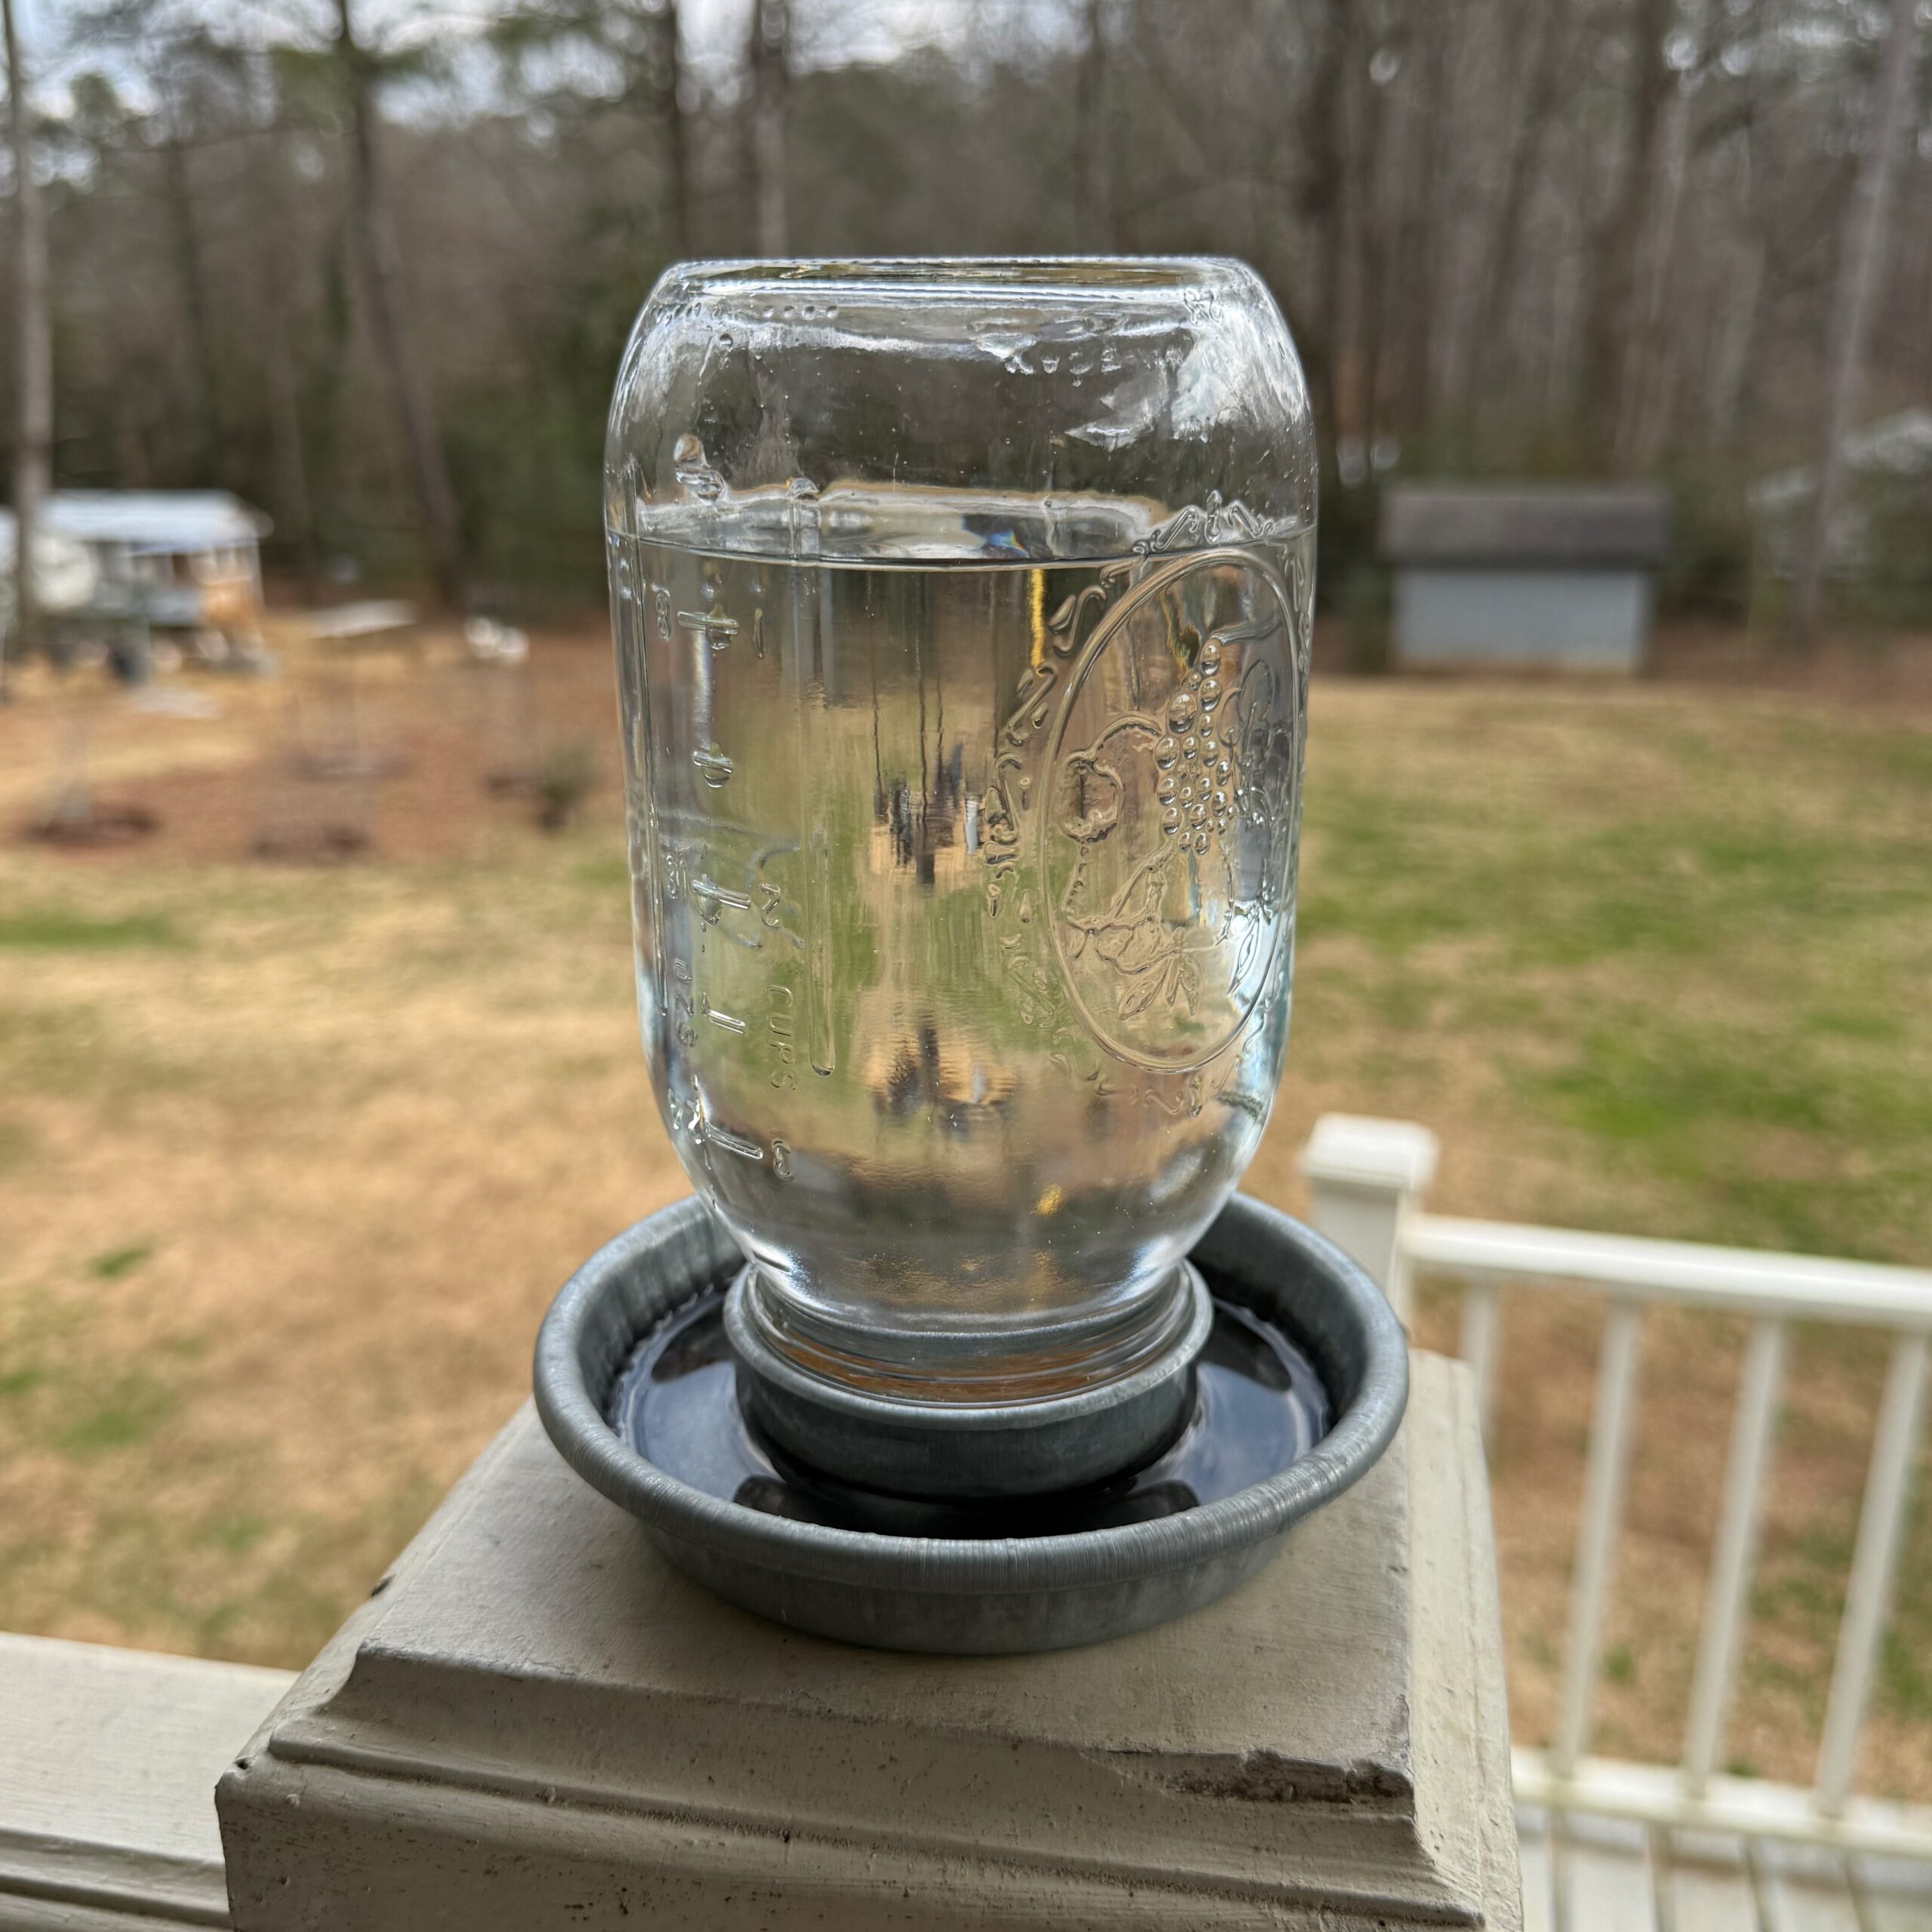
To keep the water clean and free of bedding, we place the waterer on a raised platform covered in ¼-inch hardware cloth. This prevents chicks from kicking shavings into the water, which helps reduce bacterial growth and keeps the brooder dry.
Once they’re a few days old, we transition them to nipple waterers, which are a cleaner and more efficient way to keep them hydrated.
6. Electrolytes & Probiotics: Boosting Immune Health

Shipping and relocation are stressful for chicks, and stress weakens their immune system. Many people use commercial electrolyte supplements to help their chicks recover, but we’ve found a better, more natural solution: “magic water.”
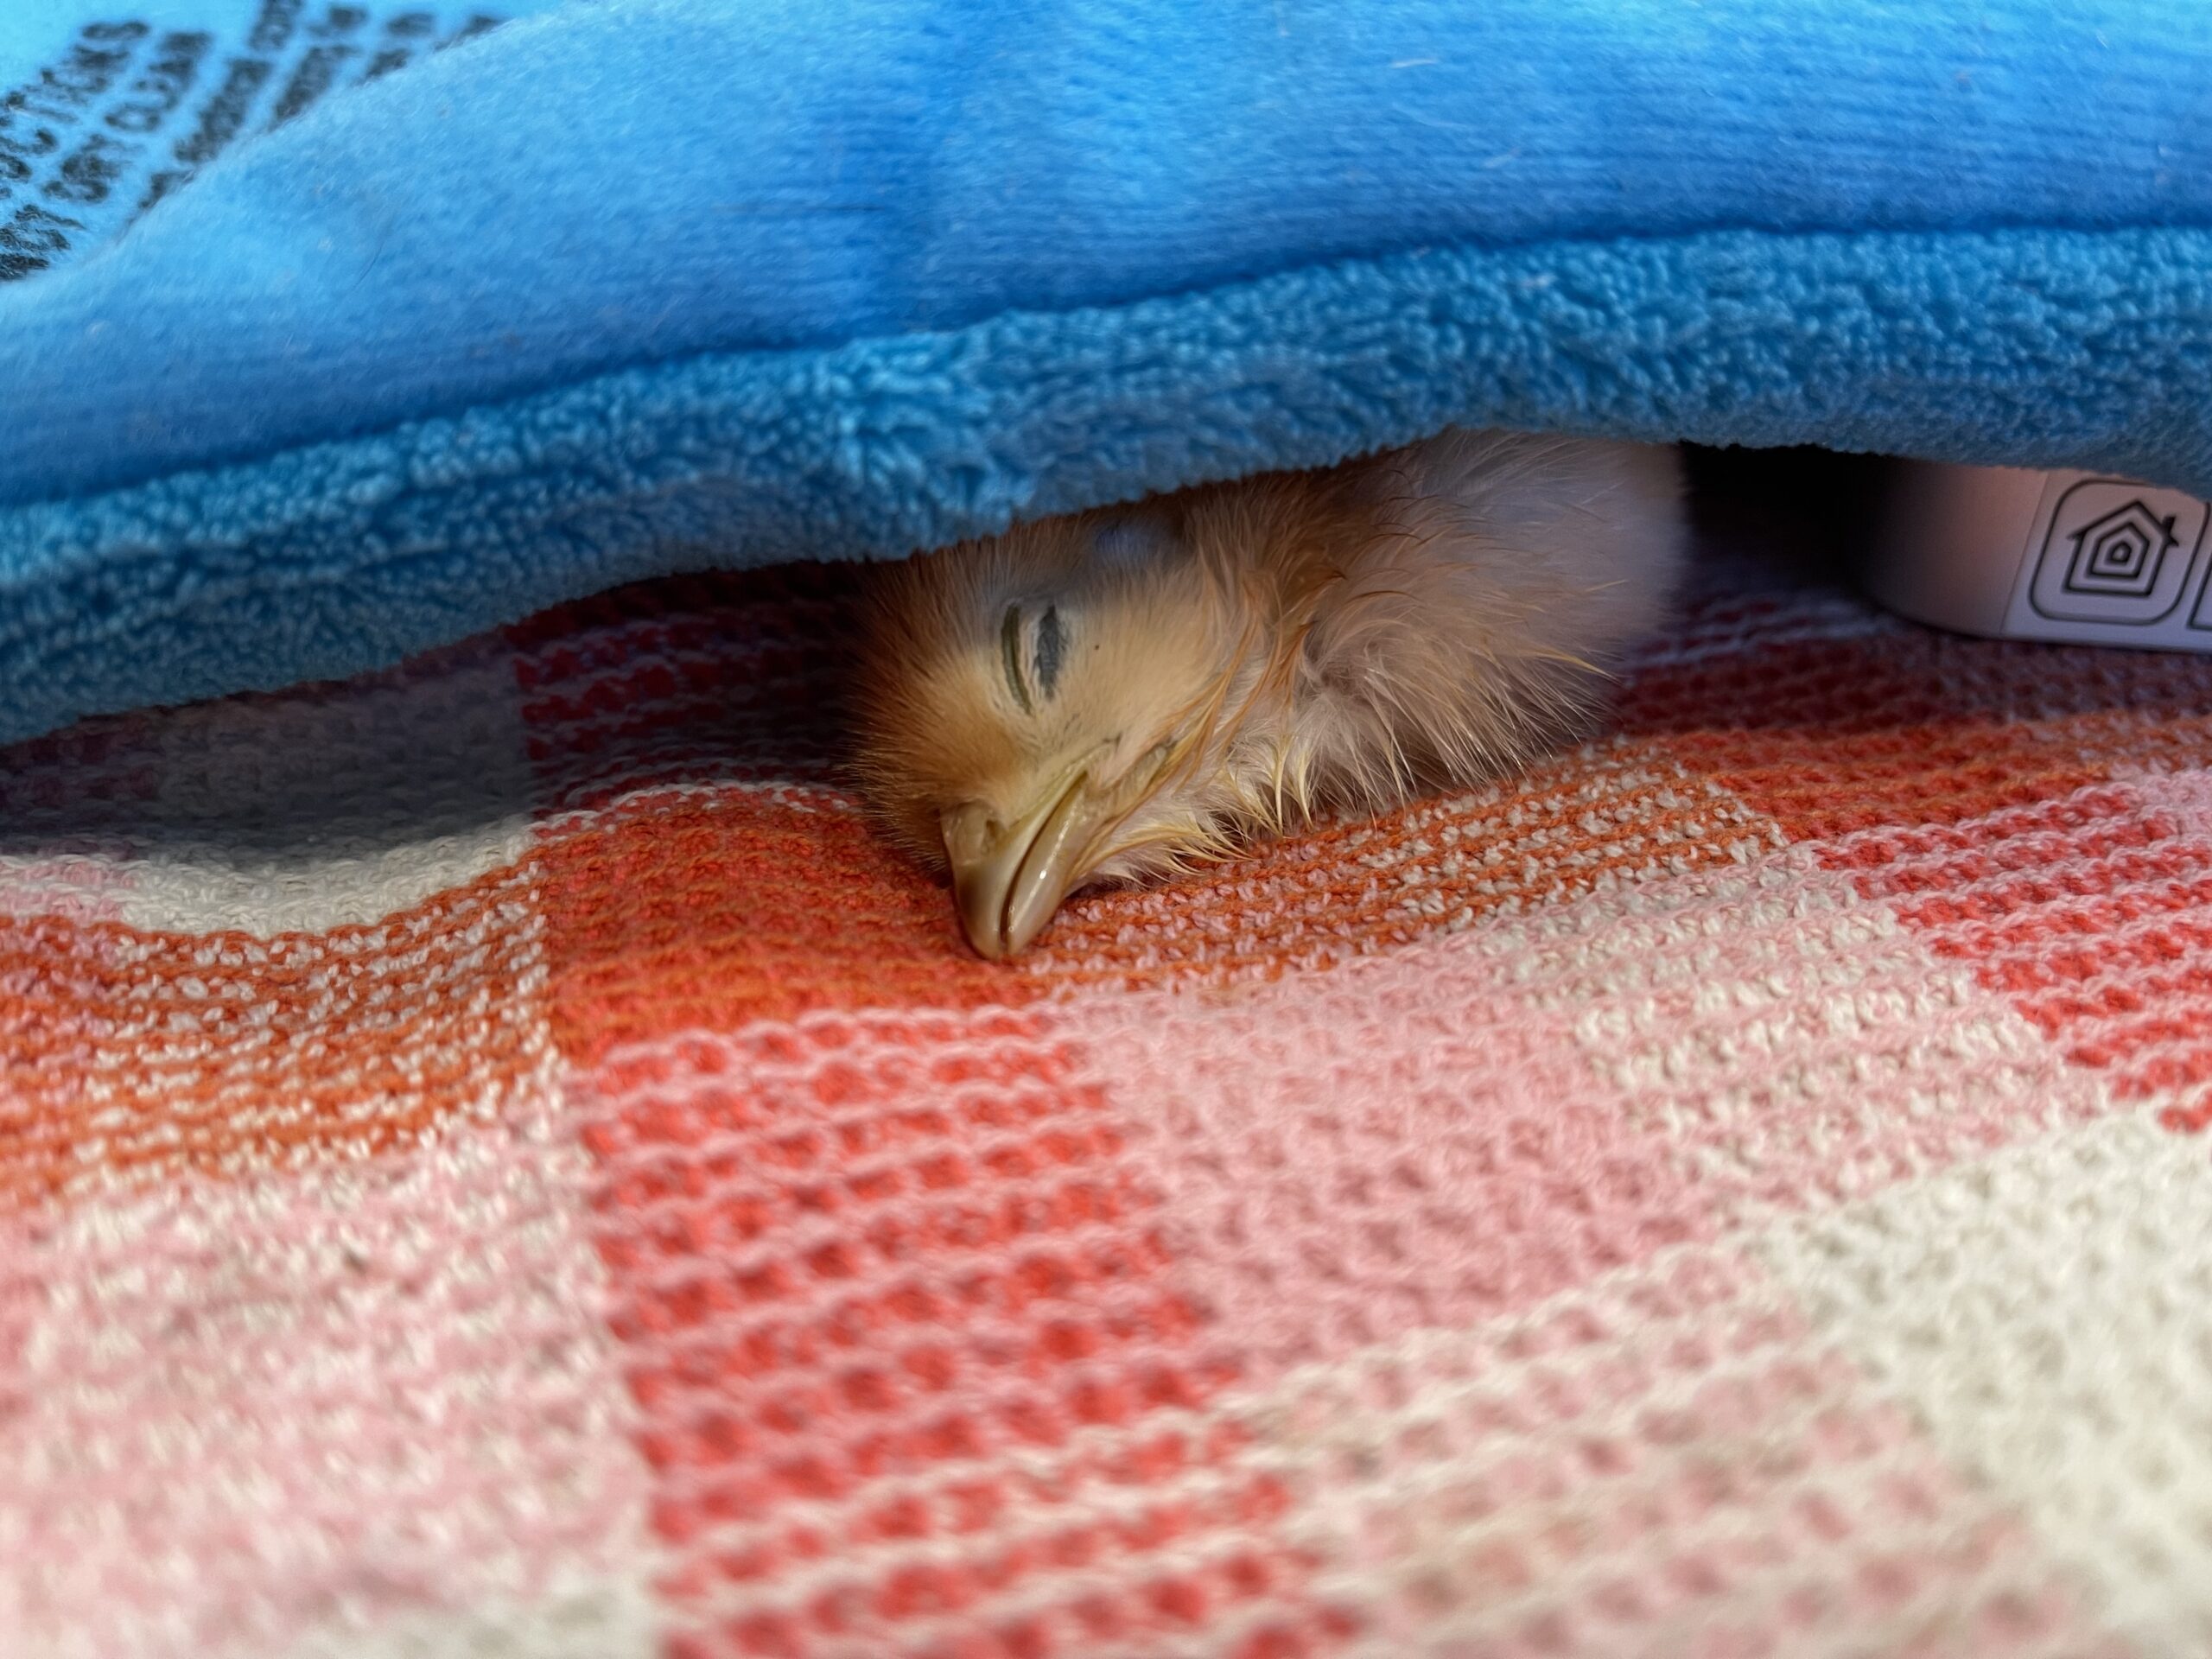
This homemade electrolyte drink is cheaper, more effective, and free of artificial additives. It helps boost hydration, supports digestion, and reduces the likelihood of pasty butt — a common condition in stressed chicks where droppings clog their vents.
Magic Water Recipe
- 1 gallon of warm (filtered) water
- 2 tbsp raw apple cider vinegar
- ½ cup raw honey
- 2 cloves raw garlic, smashed or minced
We provide magic water for the first few days after the chicks arrive, then switch to filtered, chlorine-free water to keep their gut health in top shape.
7. Feeders: Preventing Waste & Contamination
Chicks are messy eaters, and if you don’t have the right feeder setup, they will kick, scratch and poop in their food, leading to wasted feed and potential contamination. Choosing the right feeder will save money and reduce disease risk.
We highly recommend using either a hanging feeder or an elevated feeder placed on a stable platform to reduce those issues.
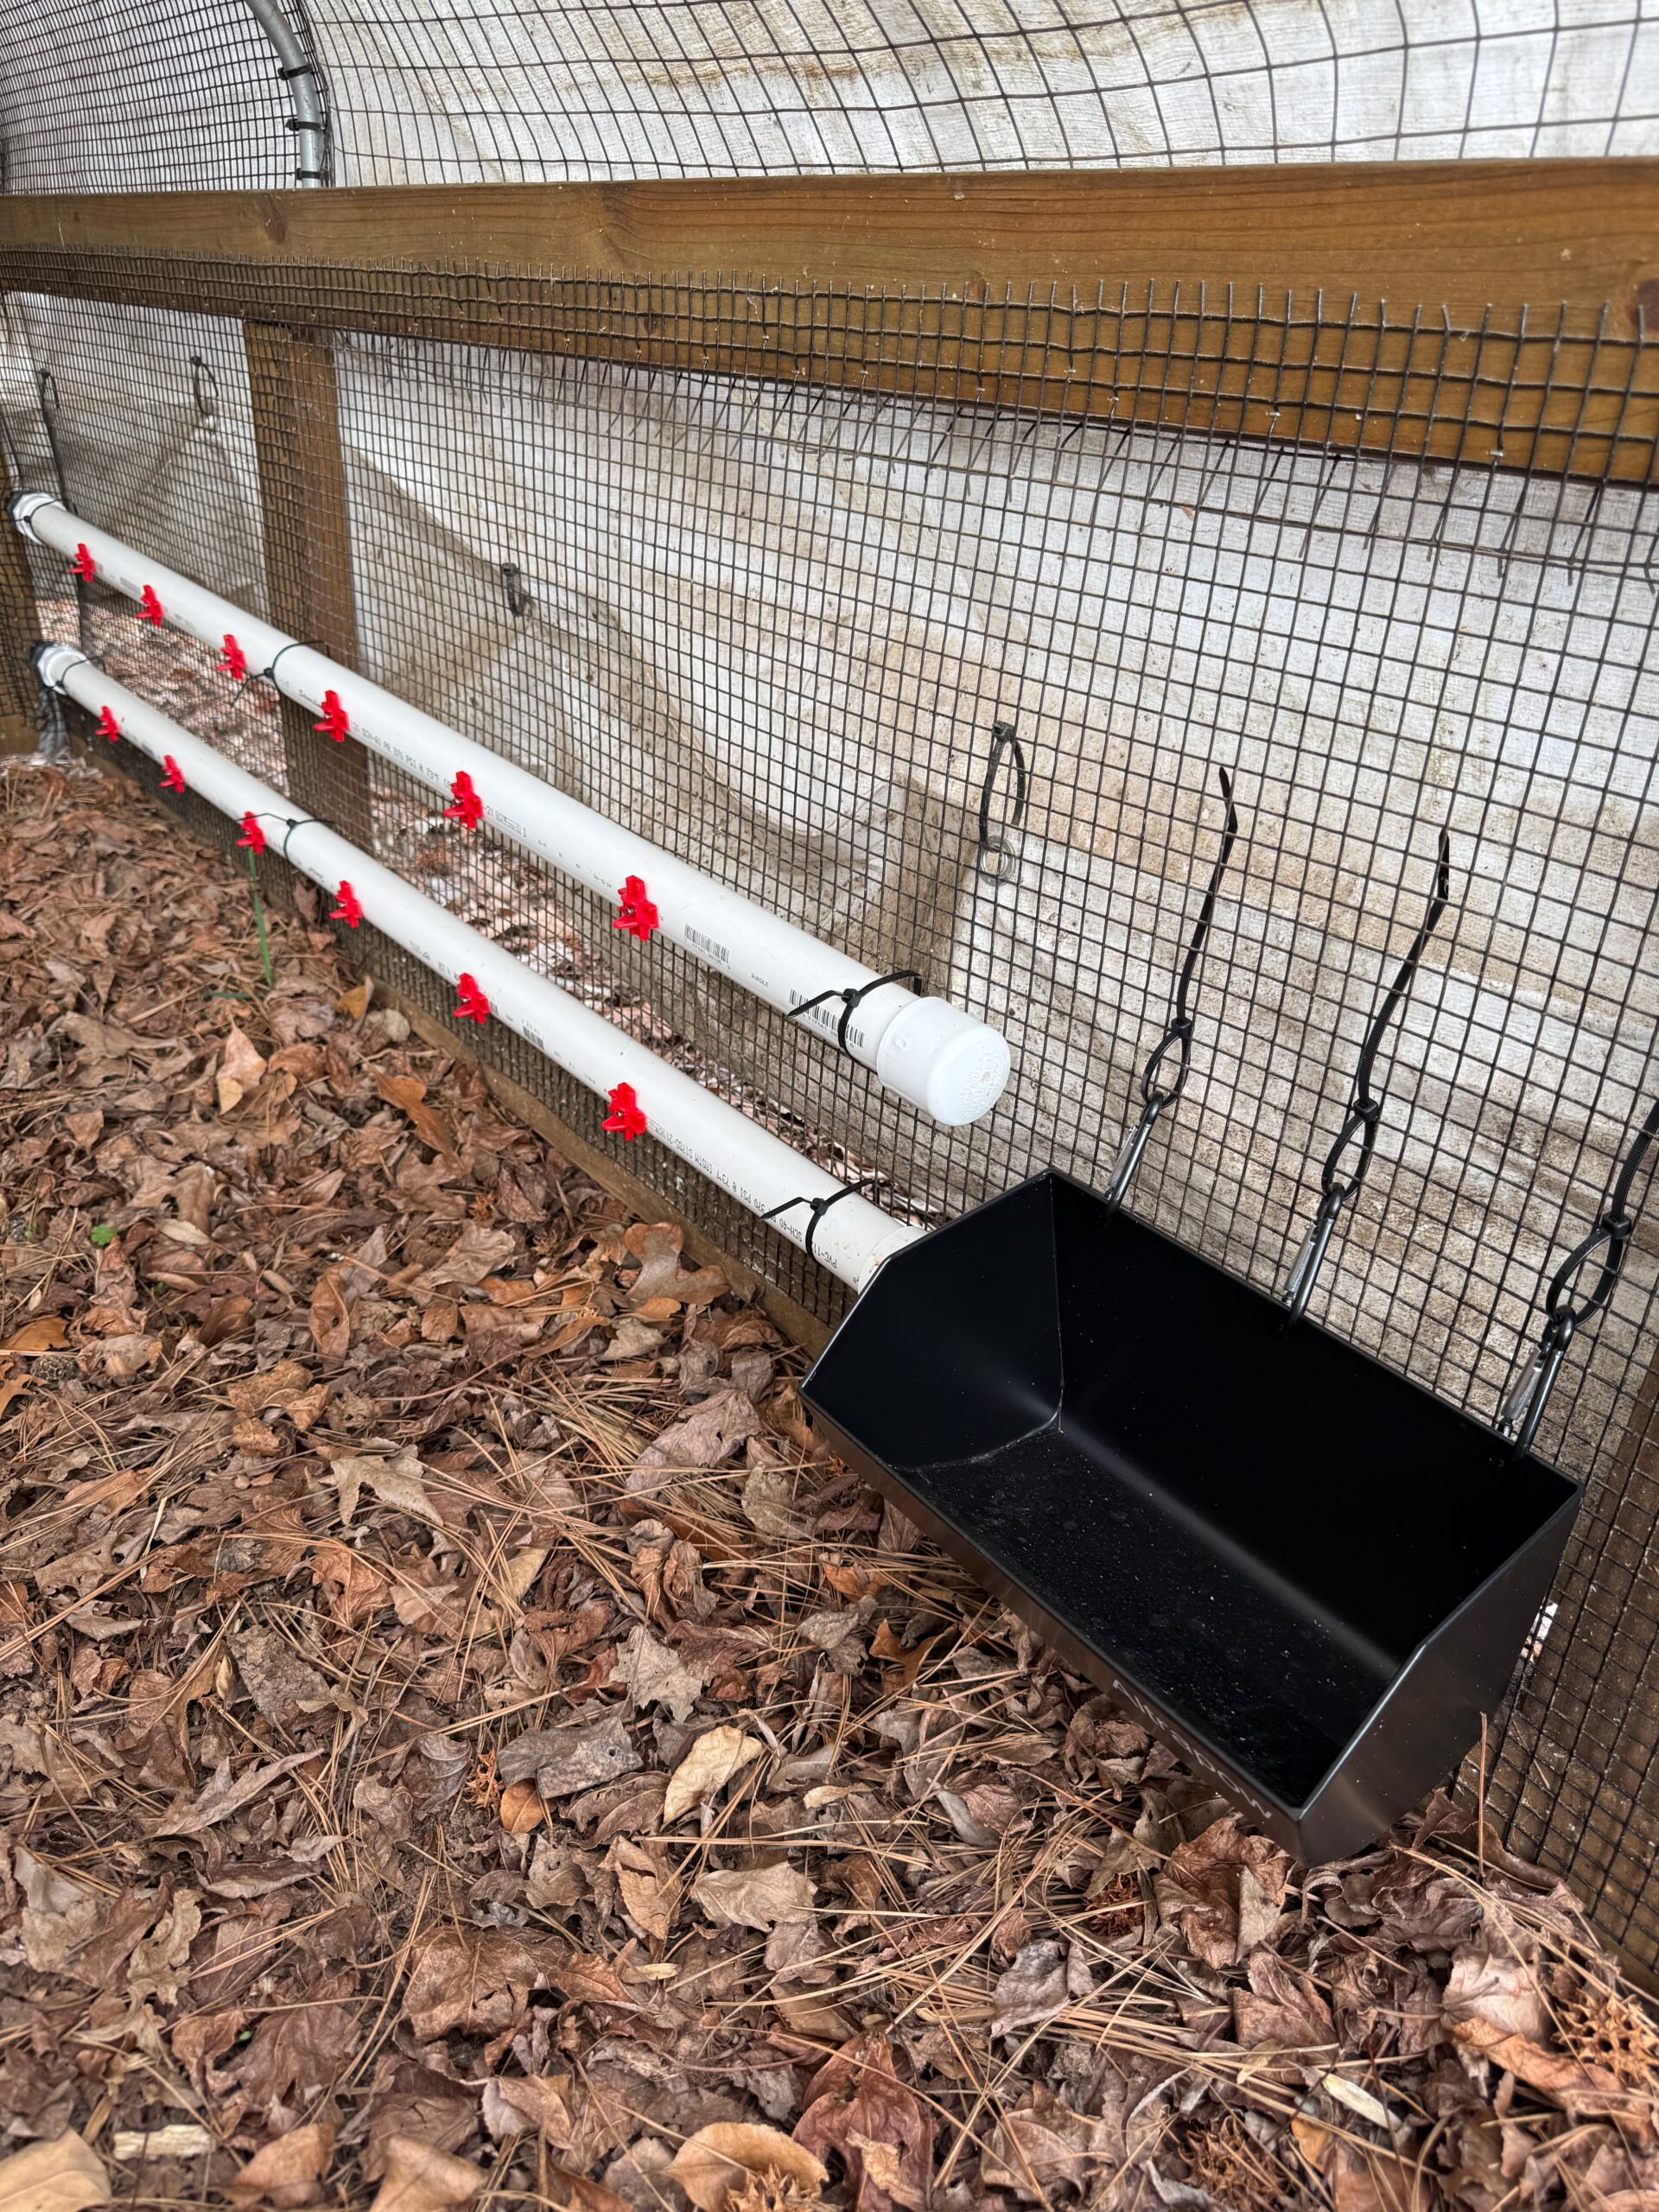
On a side note, if you’re using finely ground starter feed, you don’t need to provide grit (small rocks that help older chickens digest food). However, as chicks grow and transition to larger grains and whole foods, grit becomes essential for digestion. To give our growing chicks access to grit once they’ve transitioned to grower feed and moved to the chicken tractor, we mounted grit feeders such as the one you can see in the picture above.
8. The Coop: Be Ready Before They Outgrow the Brooder

Many new chicken owners wait too long to set up their coop, only to find themselves scrambling when their chicks outgrow the brooder faster than anticipated.
The reality is, by the time your chicks are a few weeks old, they become messy and noisy, and they produce a lot of dust with their scratching. As a result, there is a good chance that you’ll want them out of the brooder sooner than you had initially planned.
At the Kummer Homestead, we prefer mobile infrastructure rather than stationary coops. A chicken tractor, which is a moveable coop, offers several benefits:
- It reduces cleaning chores. Since the tractor doesn’t have a solid floor and is moved daily, there’s no need to clean out the bedding.
- It keeps chickens healthier by reducing exposure to parasites and manure-related diseases.
- It allows for natural foraging by giving birds access to fresh grass, bugs and soil, which improves their diet and overall health.
For those in colder climates, you may want to keep chicks inside the brooder a little longer or ensure that your coop is well-insulated before moving them outside. But in warm weather, chicks can transition to a chicken tractor as early as one to two weeks old.
Regardless of whether you choose a stationary coop or a mobile chicken tractor, ensure that it’s predator proof. Chicks are vulnerable to rats, raccoons, foxes, hawks, and even pets.
Final Thoughts
Raising baby chicks can be one of the most fun and rewarding aspects of homesteading, but proper preparation is key. By setting up a secure brooder, providing quality feed, ensuring a clean water system, and having a coop ready ahead of time, you’ll set your flock up for success.
Chickens grow faster than most people expect, and if you aren’t prepared, you could find yourself dealing with unnecessary stress and preventable losses. With these best practices in place, you’ll be well on your way to raising healthy, productive birds that provide your family with fresh eggs or meat for years to come.
Are you considering adding chickens to your backyard or homestead, and have questions or concerns? Or have you been raising chickens for generations and would like to share more tips and tricks? We’d love to hear from you, so let us know by leaving a comment below.

Michael Kummer is a healthy living enthusiast, the founder of MK Supplements and the host of the Primal Shift podcast. His goal is to help people achieve optimal health by bridging the gap between ancestral living and the demands of modern society. He runs the Kummer Homestead with his wife Kathy and their two children.